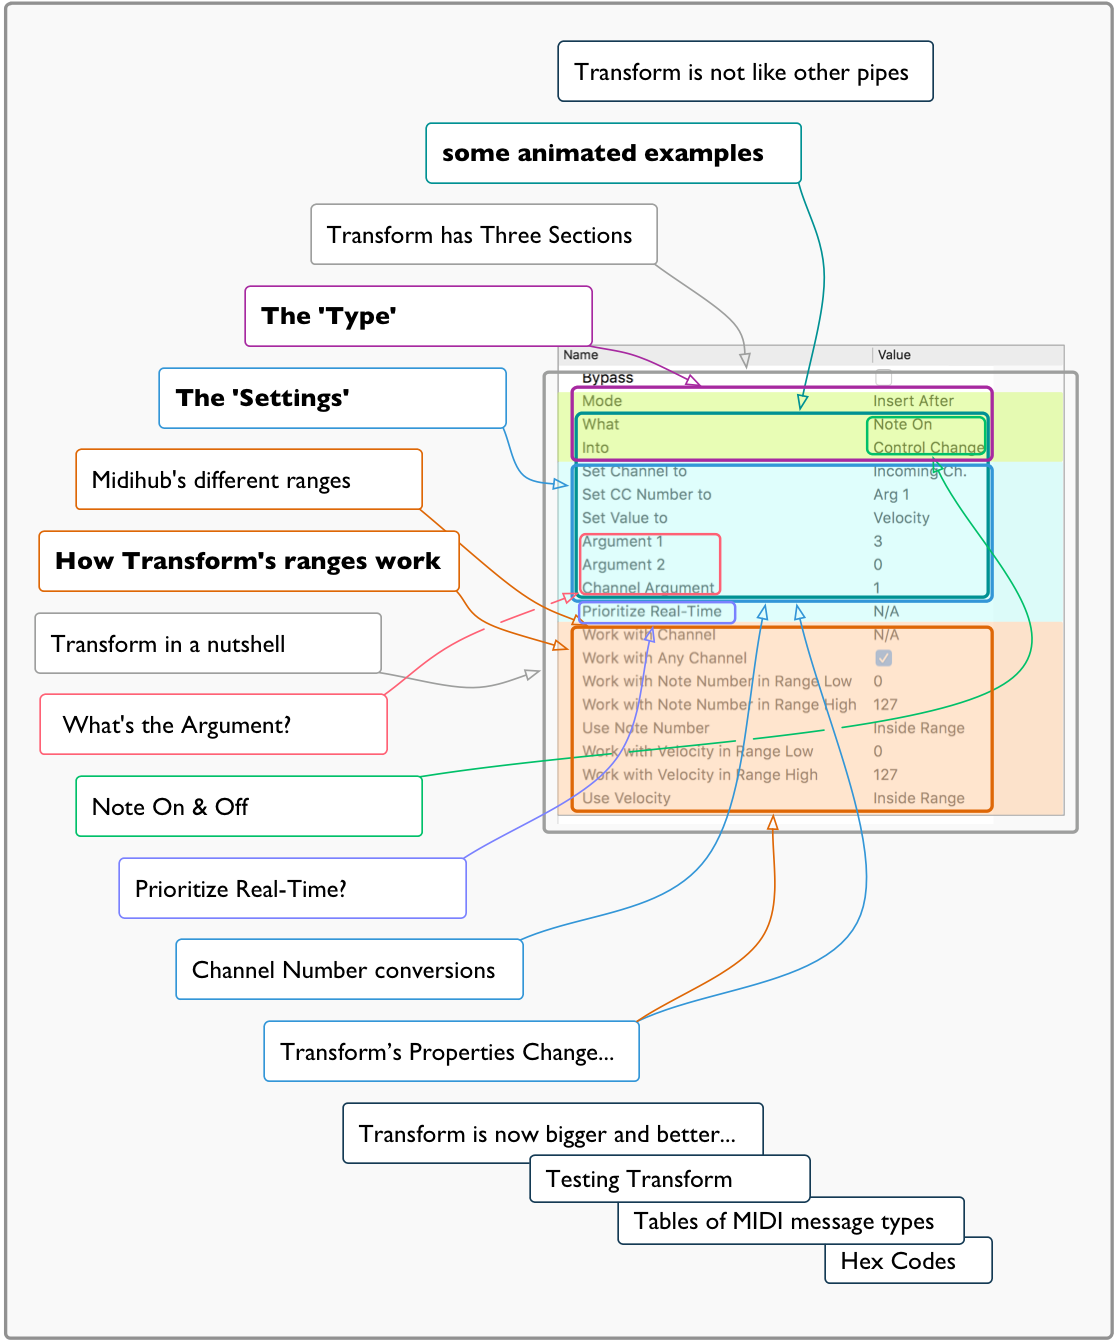
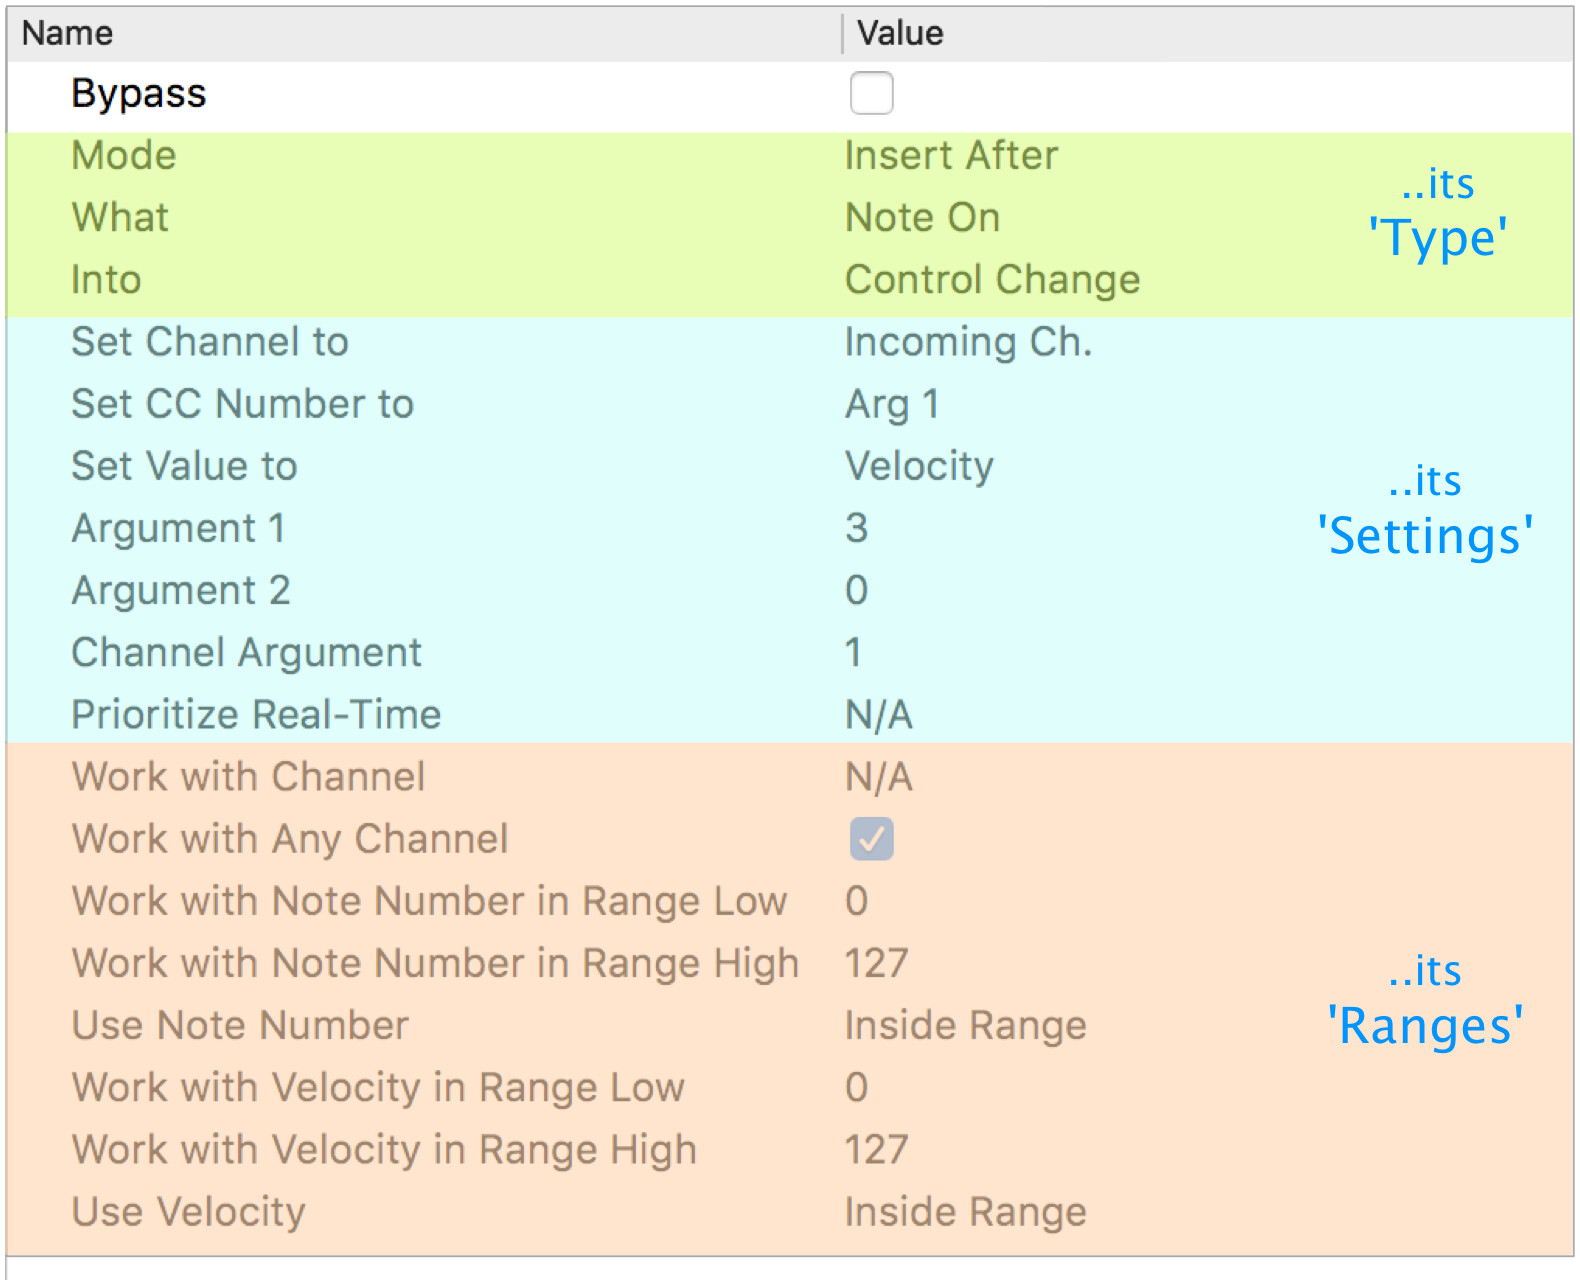
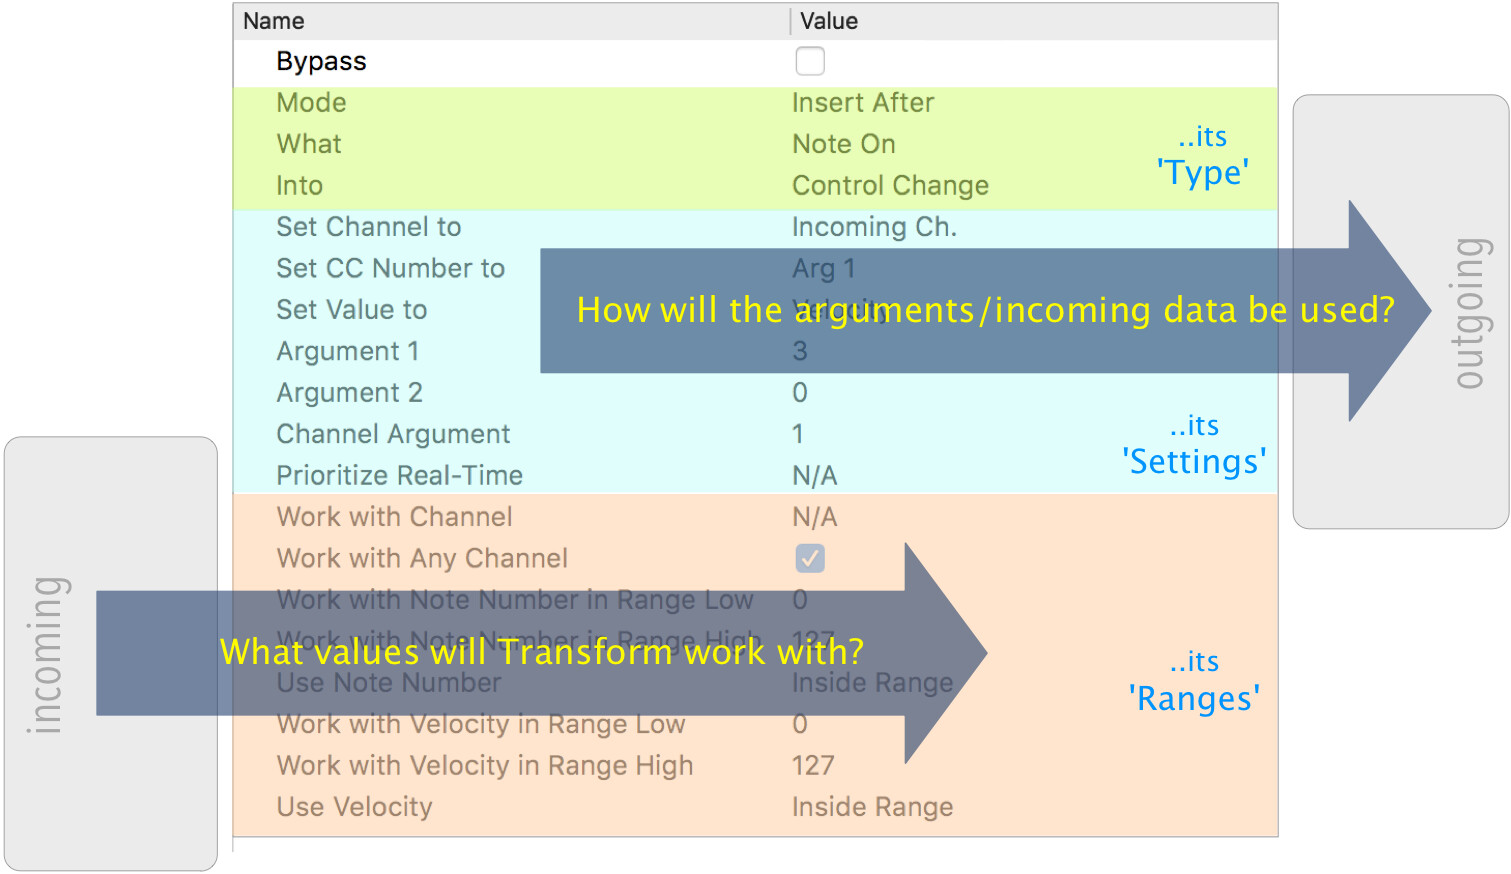
How Transform’s ranges work
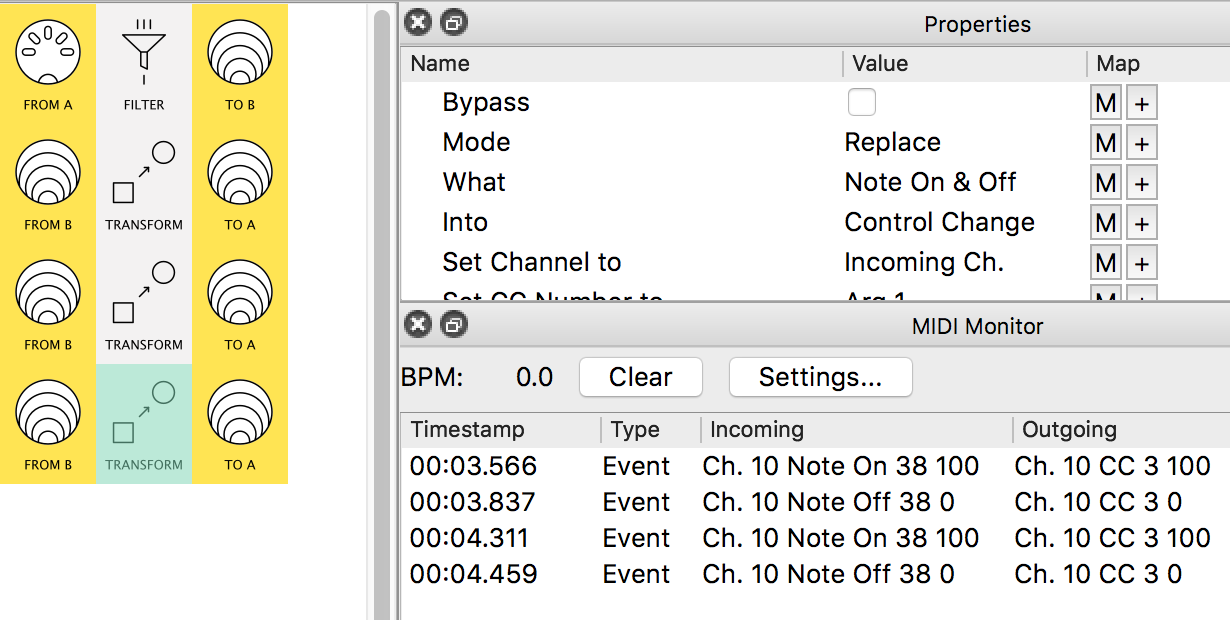
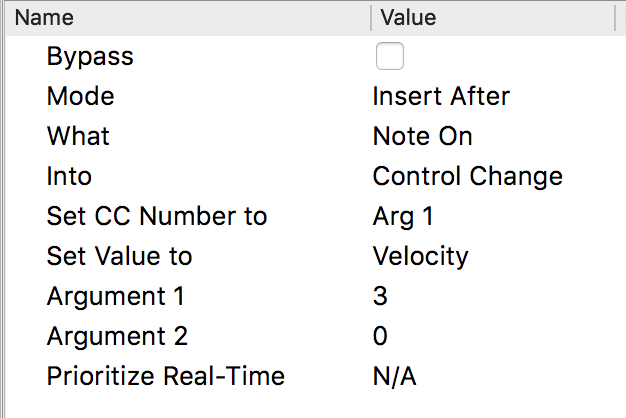
Once you have told Transform What type of messages it will work on…
the Transform’s ranges gives a lot of control over..
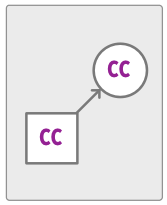
..whether to create new messages from all of them –the default–
..or just a select few.
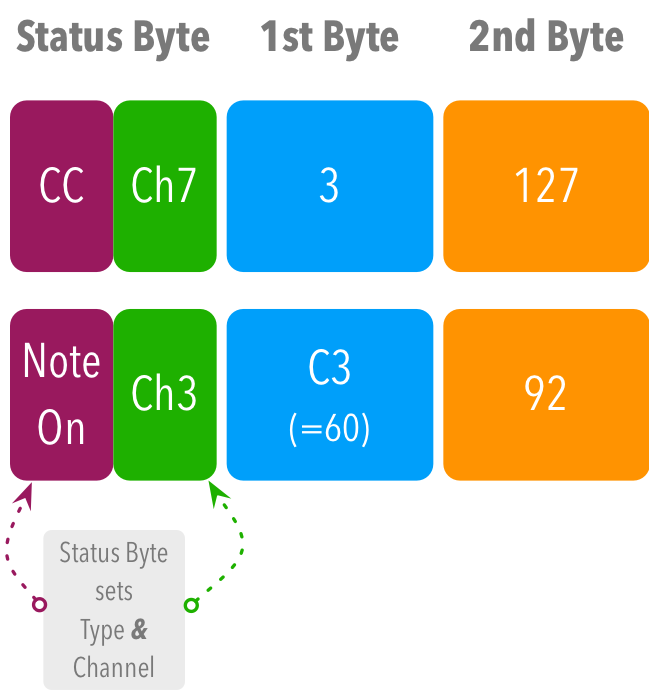
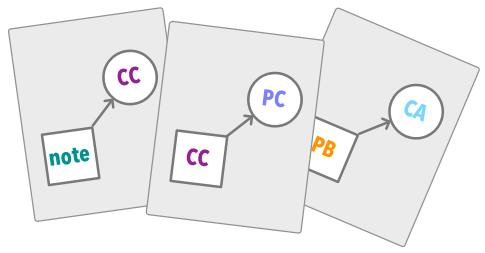
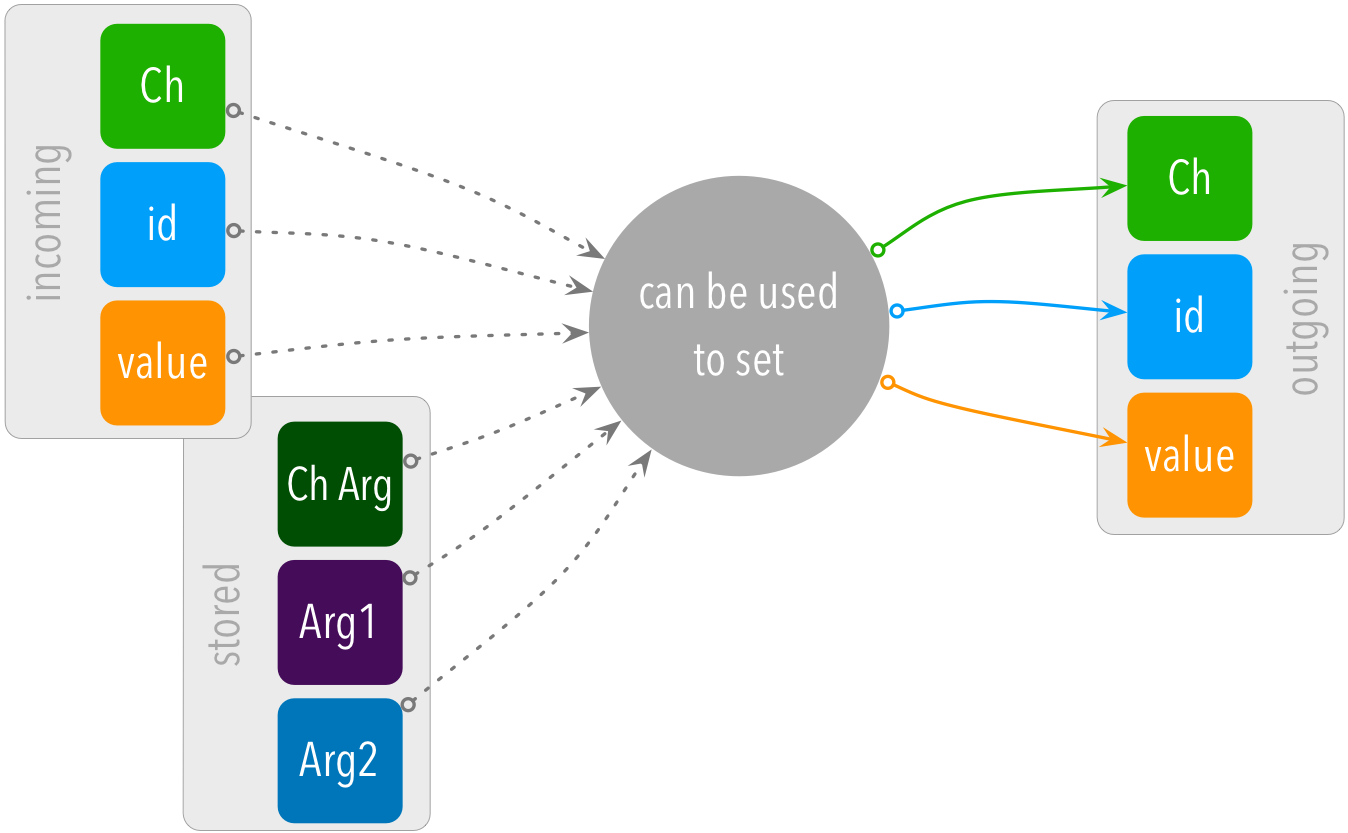
Let’s start with some message types that come with the most information :
Note On, Control Change and Poly Aftertouch
As well as the ‘id’ and ‘value’ carried in their 2nd & 3rd ‘bytes’…
(recall:)
| (type |
& Channel) |
‘id’ |
‘value’ |
| Note On |
Channel |
Note Number |
Velocity |
| Control Change |
Channel |
CC Number |
Value |
| Poly Aftertouch |
Channel |
Note Number |
Pressure |
| ‘What’ |
‘Where’ |
‘Which’ |
‘How Much’ |
…they all have a channel…
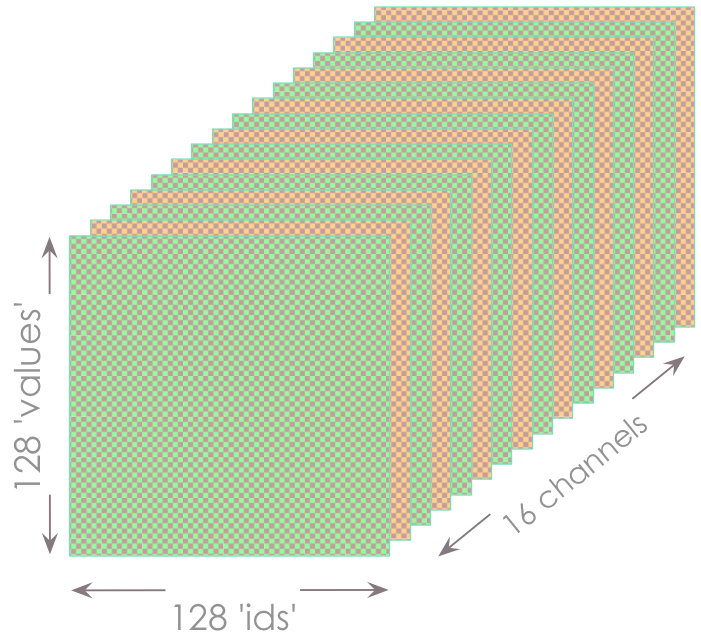
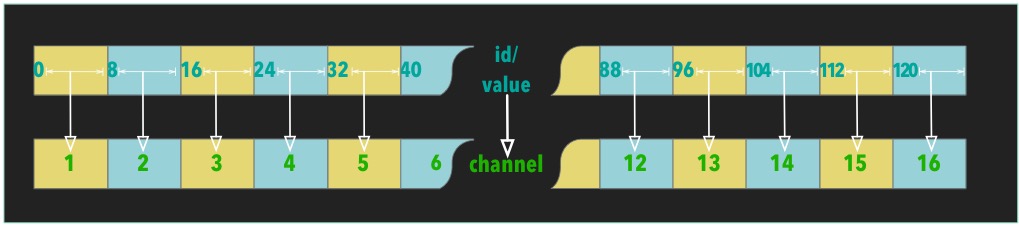
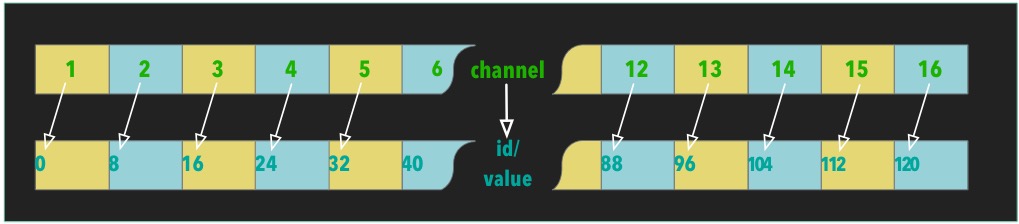
…So we can think of the full range of their data as being like a three-dimensional grid
Channel x ‘id’ x ‘value’:
Transform’s ranges (and Channel) let you decide…
…the sections of the grid that you want to focus on.
(like telling it …Where , Which , How Much)
Let’s look at some of the Range properties.
Sticking with Notes, Control Changes and Poly Aftertouch:
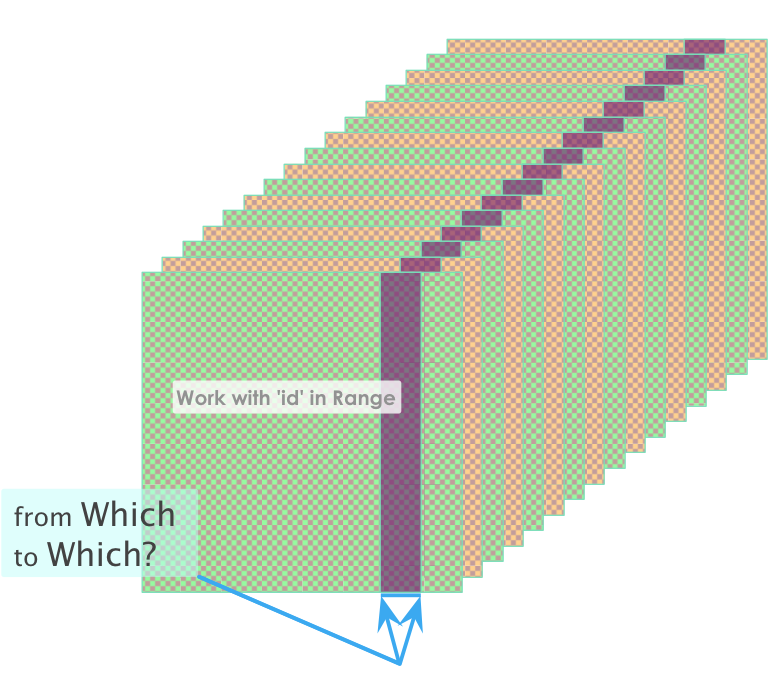
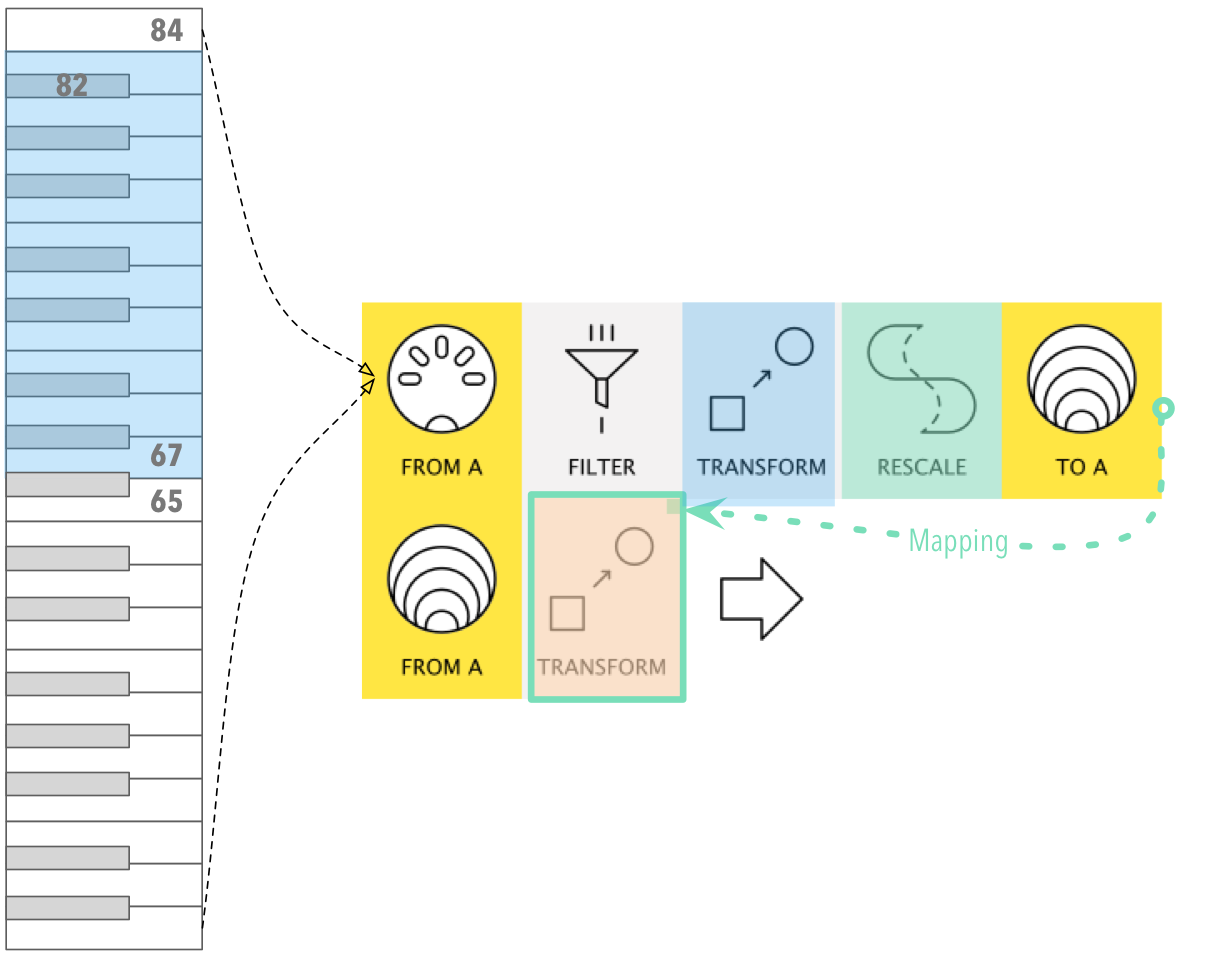
The first pair of properties Work with ... in Range Low|High…
..let you choose which Notes..
…or CC#s…
…or Poly Aftertouch Notes..
.. Transform will act on:
depending on the message-type..
..the diagram might show:
-
only transforming the 7th octave (of Notes On/Off/On&Off)
-
or acting only on CC#104~111
-
or creating a new message for every Polyphonic Aftertouch event just in octave 7
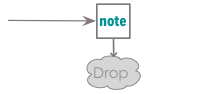
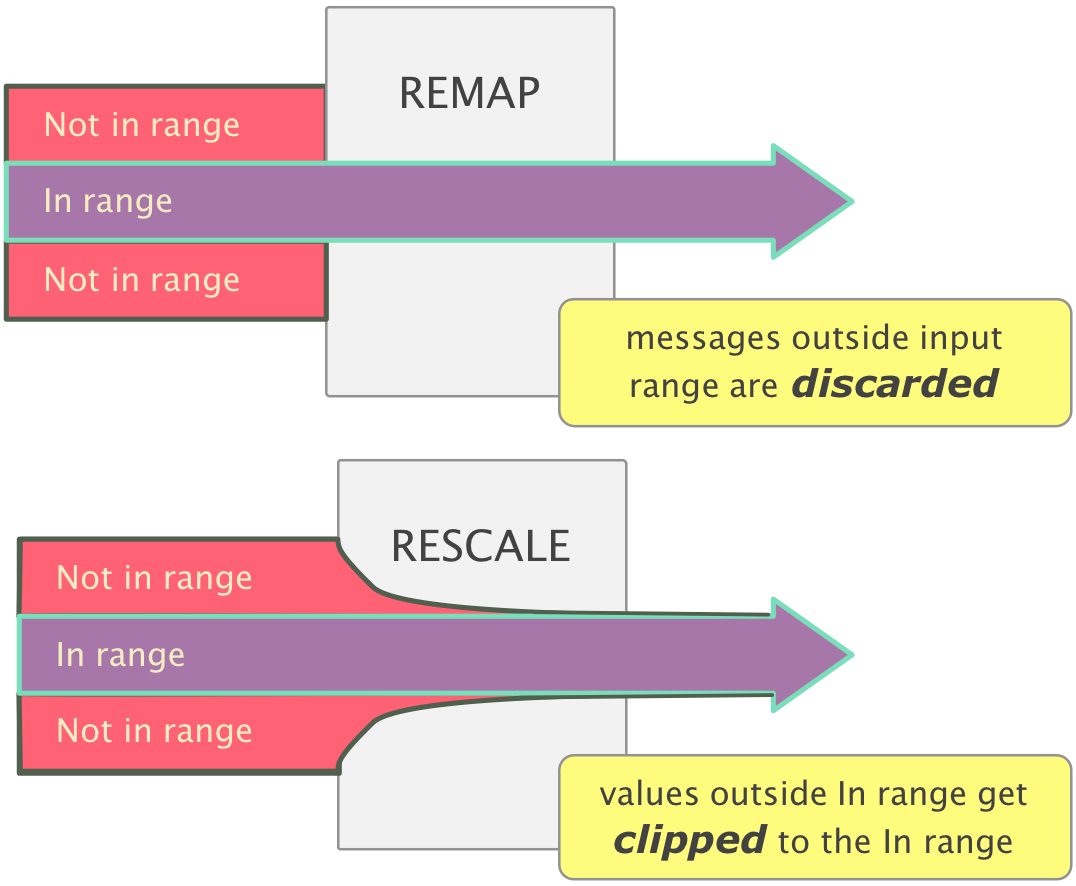
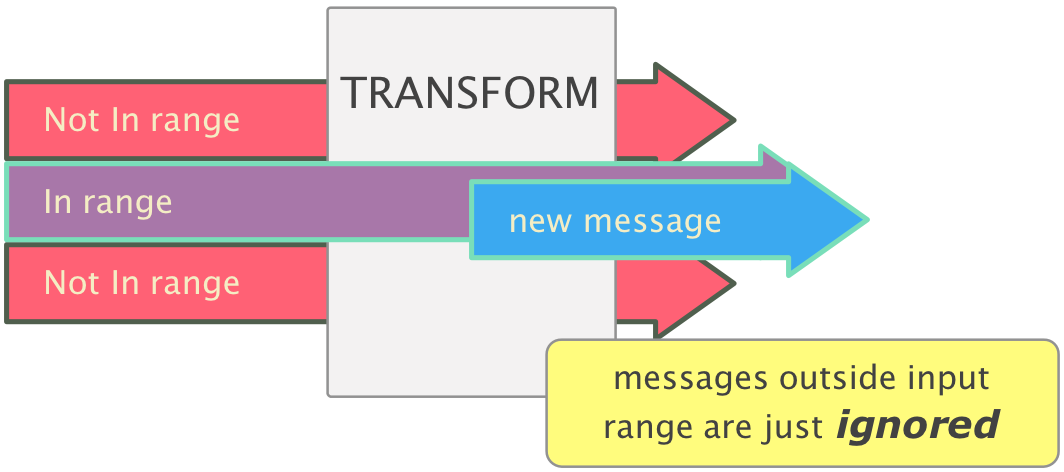
Remember all the events that don’t fit the criteria just get ignored and pass through
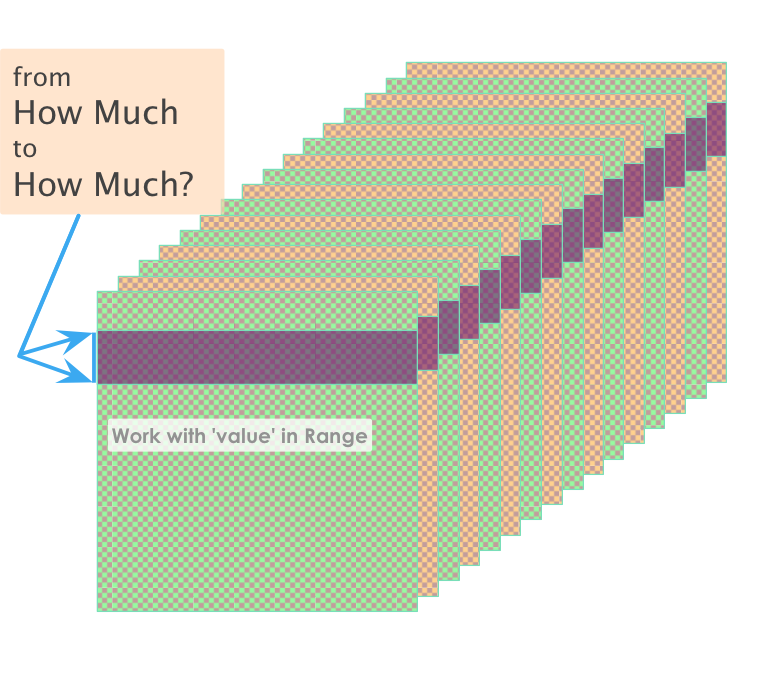
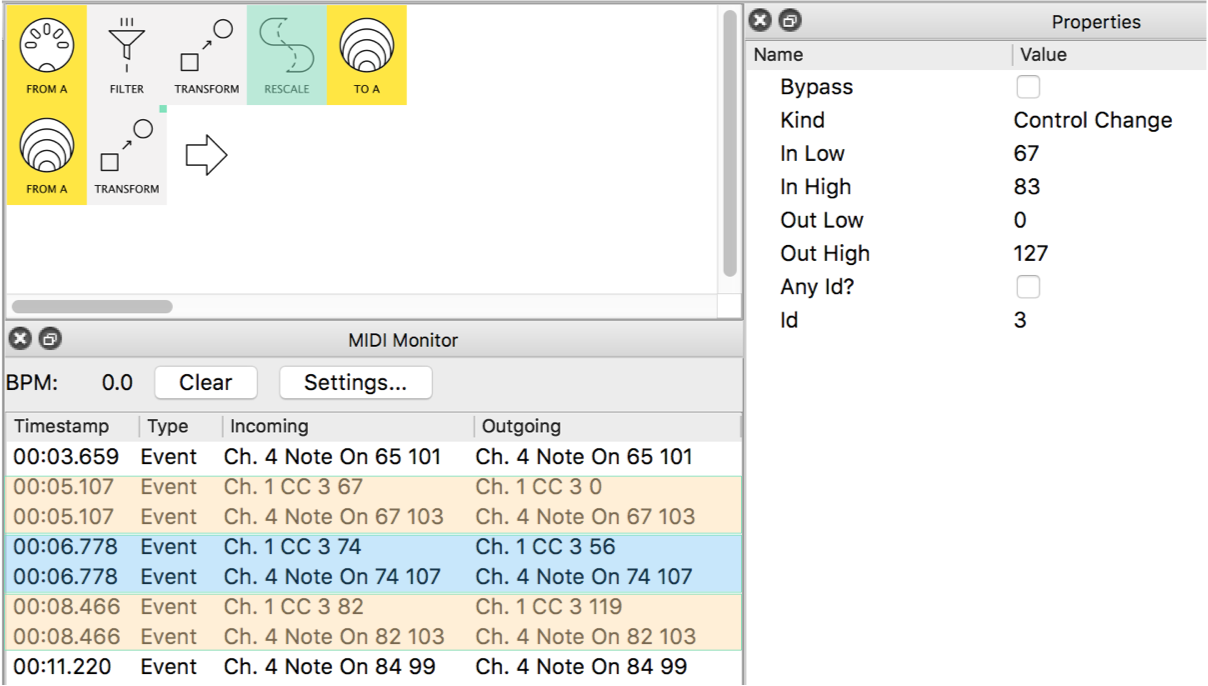
Or, using the second pair of Work with ... in Range Low|High..
… you could choose the ranges of velocities (or CC values or Aftertouch pressure values) to act on:
Now..
...this diagram could show:
-
triggering a new event only when any note is played fortissimo
-
or transforming only for CC values 106~118
-
or creating a new message whenever Aftertouch Pressure is between 106 and 118
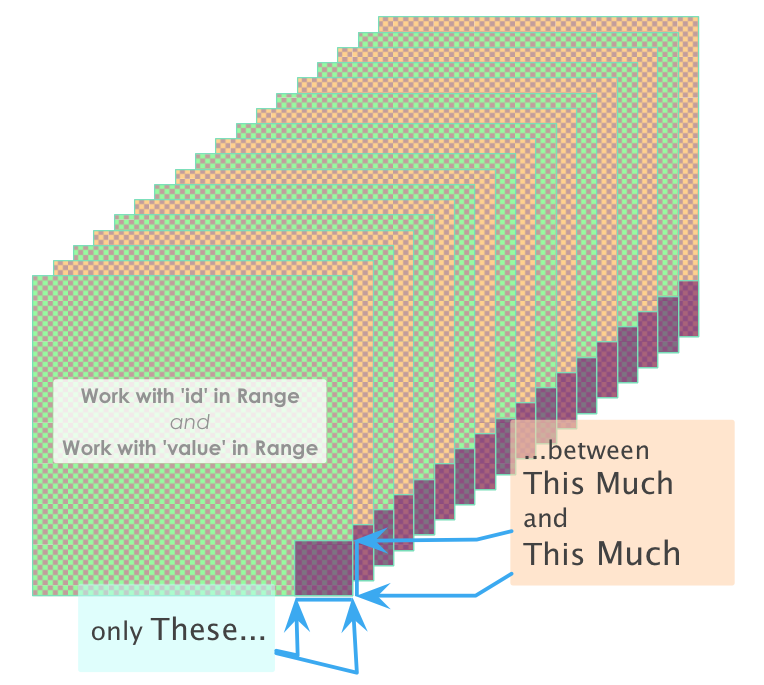
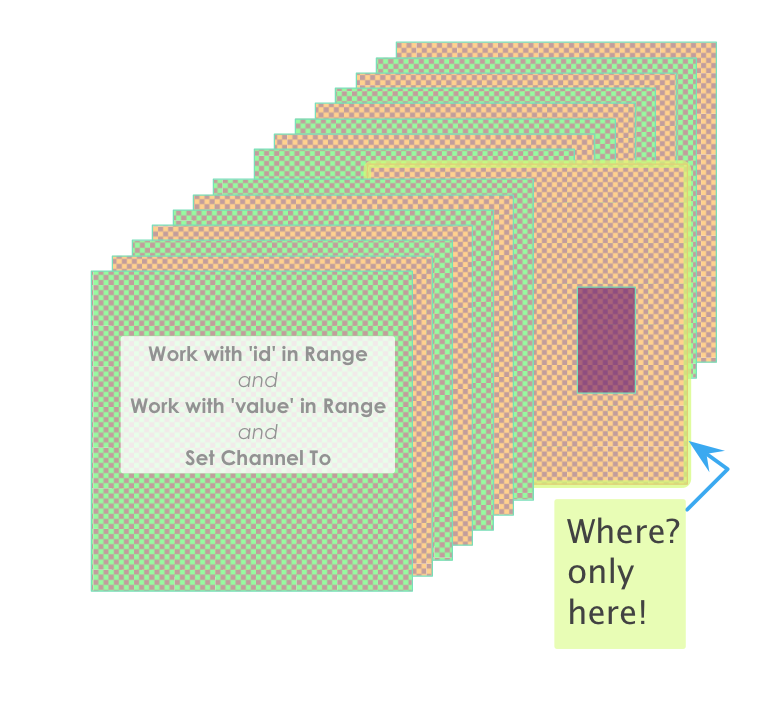
And, of course, these Ranges can be combined…
…allowing you to be even more specific:
now..
...the diagram could represent:
-
transforming only the top notes when played at low velocities
-
or acting on only on CC#111~127 for values 0~20
-
or creating a new message whenever gentle Pressure is applied to the high notes
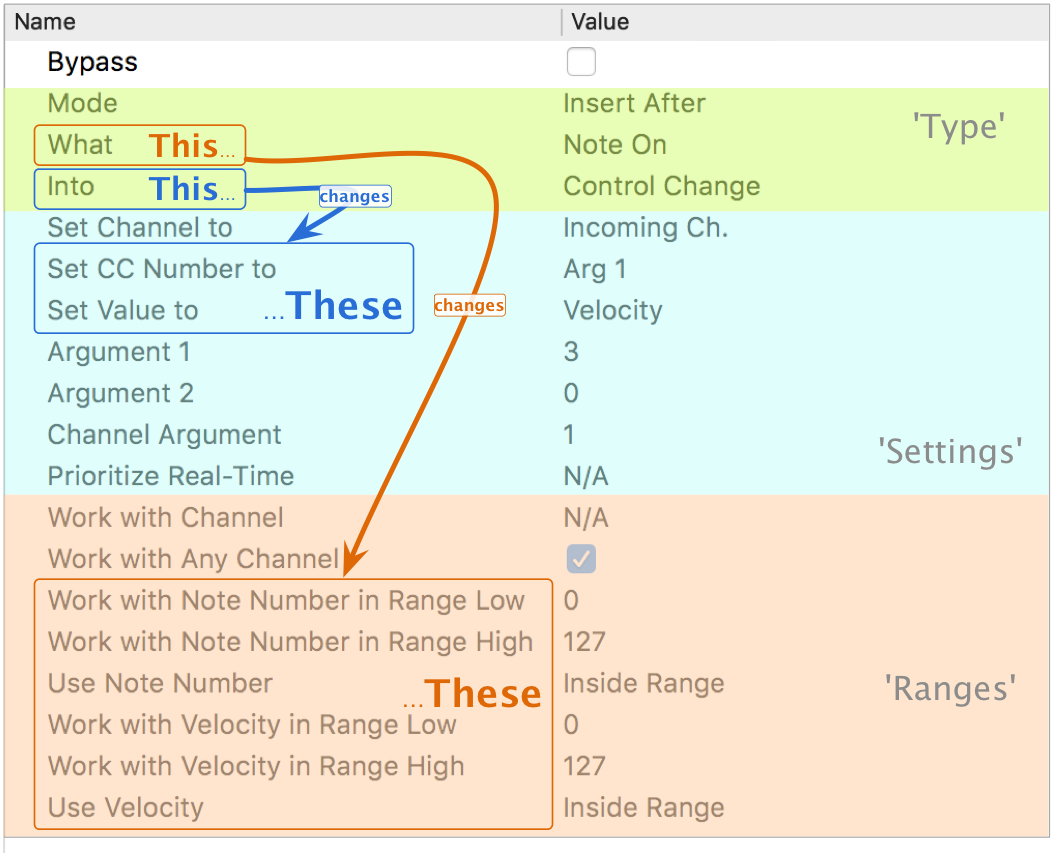
For even more refinement, we can add Work with Channel to our criteria:
Now even if an incoming message matches the type set by
What and both Ranges…
..it will be ignored unless it matches the set Channel.
The above diagram could show a Transform which works on a couple of octaves of notes played on Channel 8 at middling velocities, for example.
Transform now has great scope

It’s maybe worth taking a moment..
… to realise that Ranges (and Work with Channel) allow you:
to go from “Transform any message of this type”..
(say every CC# with any value in every channel ~ that’s over 250,000 distinct messages!)
… right down to
..“Transform only this (‘id’) when it has this single (‘value’) when the message is on this channel”
(so, from a huge drag-net to a pair of tweezers, if you like!)
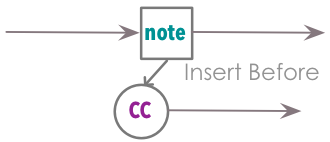
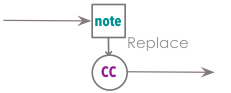
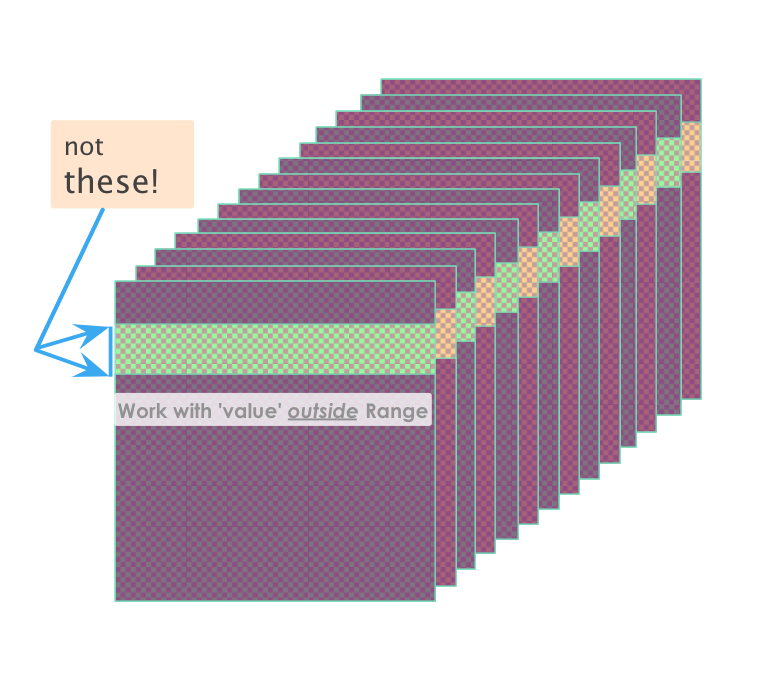
To complete this section, it’s worth noting:
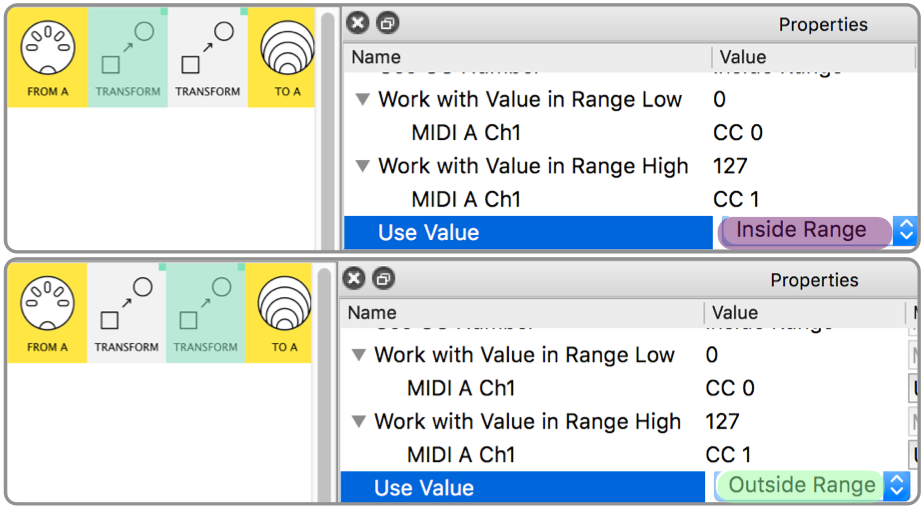
First, that we can
...'invert' ranges...
by selecting Use Value = Outside Range
As well as being useful when the ‘ids’ or ‘values’ we want are at both ends of the full range..
…it’s very handy when we have two Transforms that together cover the whole of the range
..and virtually essential if we want to map the Range settings of those two Transforms:
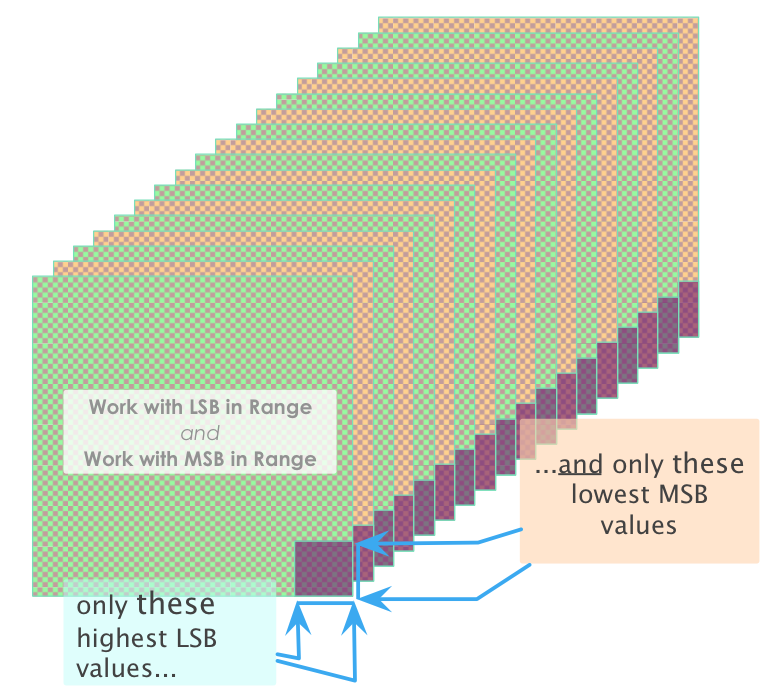
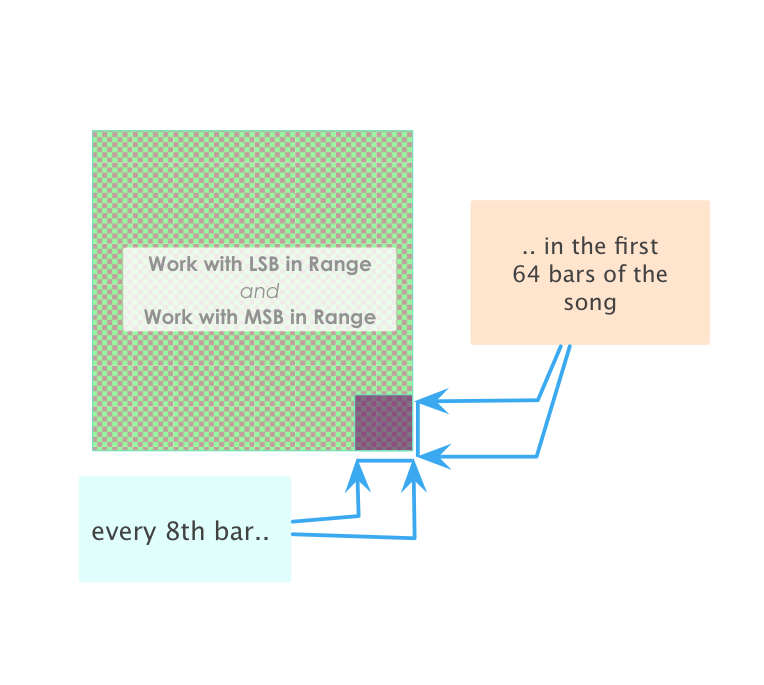
Second, that the same ideas apply to
messages with MSB and LSB...
…for Pitch Bend this shows messages being created for a bunch of ‘Fine’ values… …but only when the lever is over on the the Left (giving low ‘Coarse’ values)
…whereas with Song Position Pointer it could mean firing off a new event when a sequencer tells Midihub it’s at certain places in the song :
Third, that the first range…
...can be used for some other types:
like Program Change, Channel Pressure and Song Select
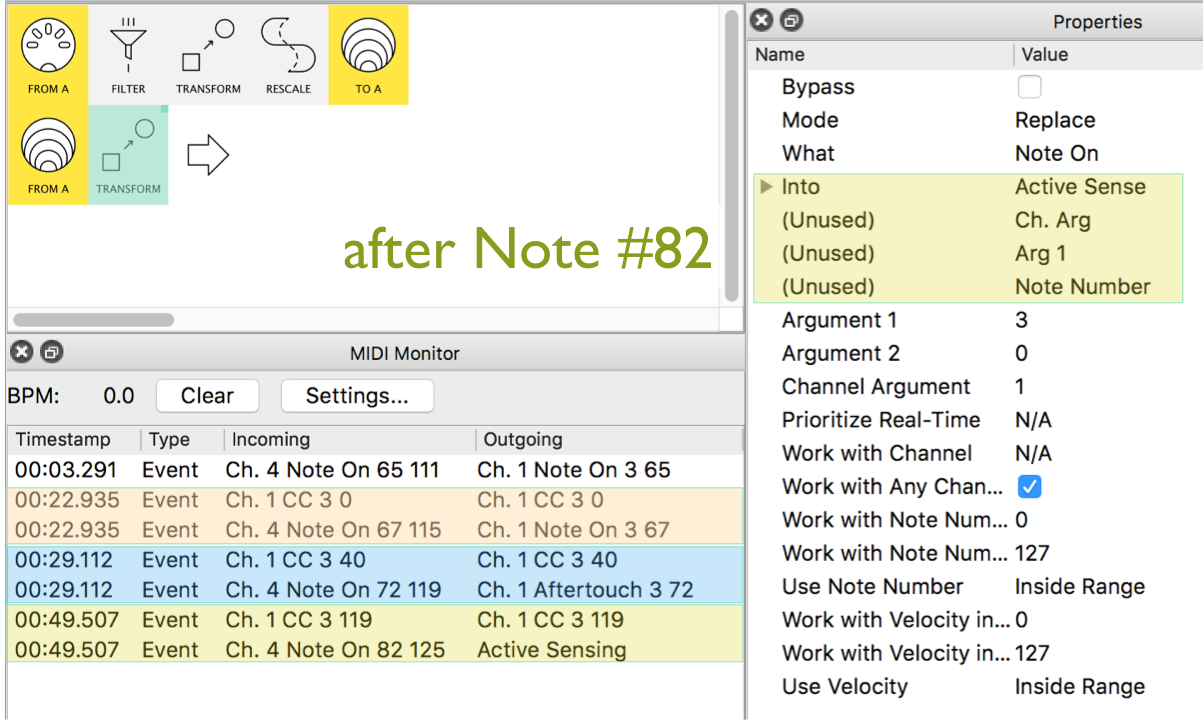
(You’ll notice that the properties for the 2nd Range change to (Unused) when What is set to these types – see “Transform’s Properties Change with Message Type” )
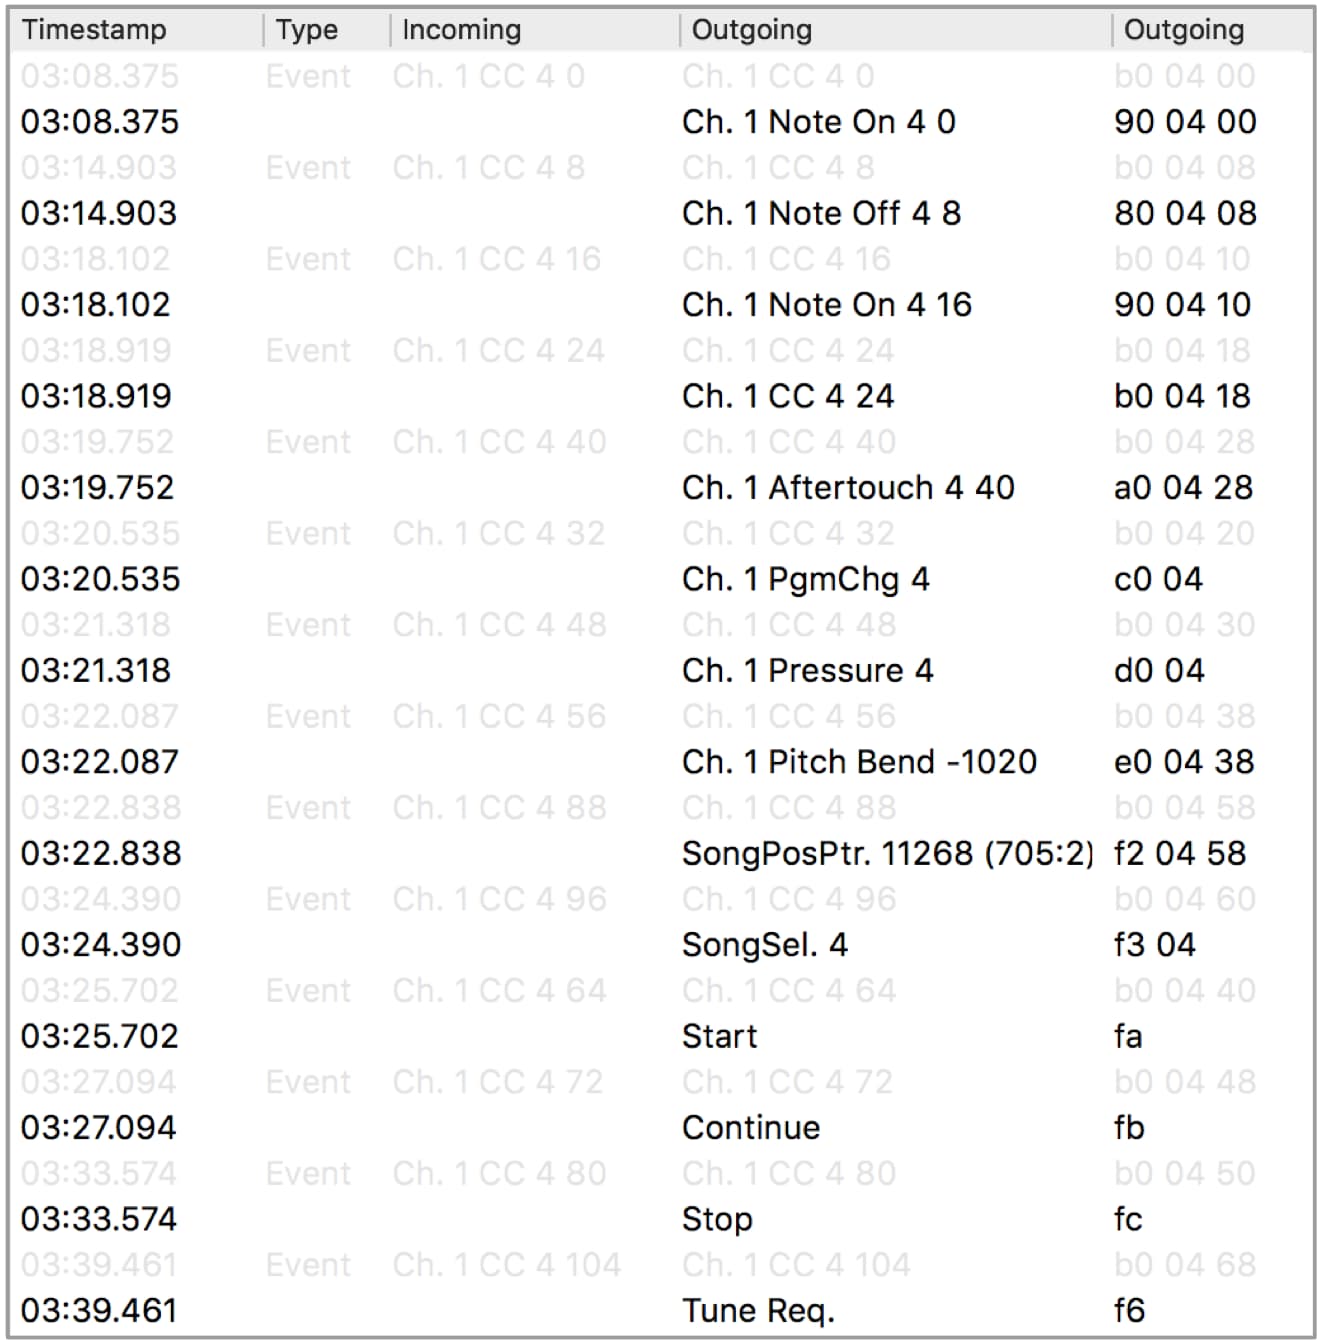
And, finally, that the ‘simplest’ message types:
Start, Continue, Tune Request, Clock, Active Sense, Reset…
don’t have any ranges to restrict!