Making the Right Connections
development: 8 testing: 3 play: 6+
Whether you’re building a patch to get the most from your gear in your “studio” or trying to get the smoothest “performance” possible, building a patch is often about evolving ideas and changing direction as you try things out.
We will “signpost” these ‘junctions’ with ![]() thinking aloud
thinking aloud ![]() captions
captions
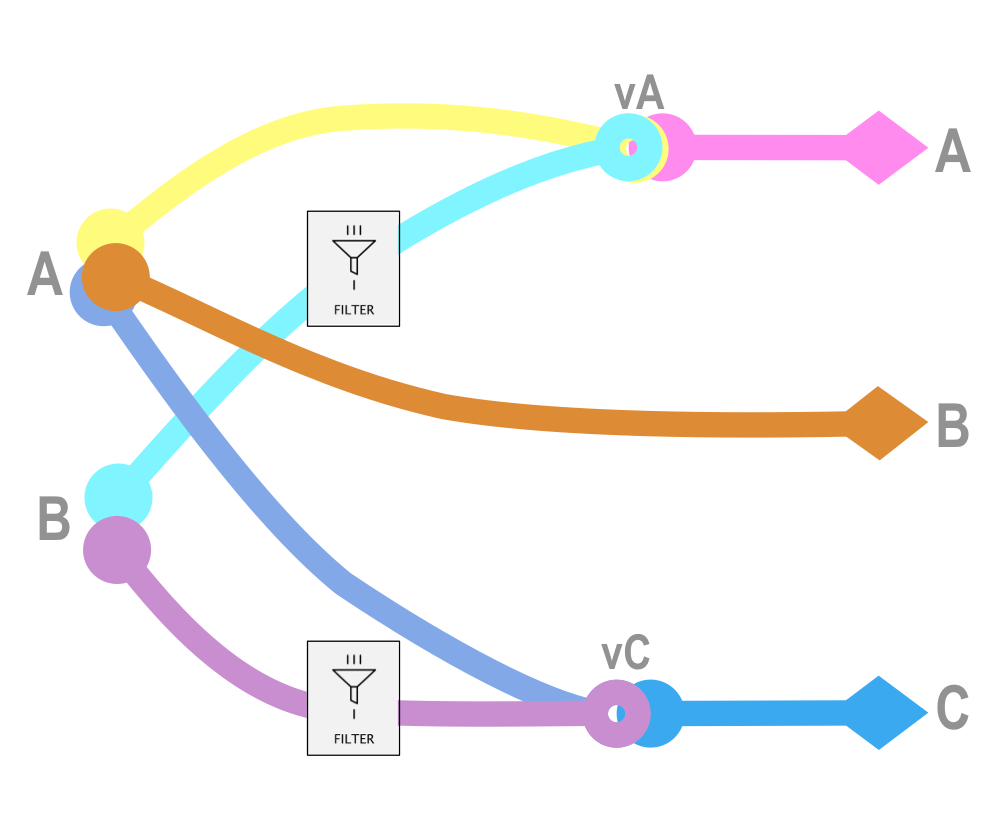
This is our starting point:
I’m going to mostly leave the sequencer to do it’s stuff…
…the most I might do is mute a part/ clip every now and then.I mainly want to add synth Lead notes with controller keyboard…
…maybe holding notes with the controller’s Arp onI’ll change keyboard channel to switch to Bass when it feels right
Remember our set-up:

of course you’re writing for your set-up
To start:
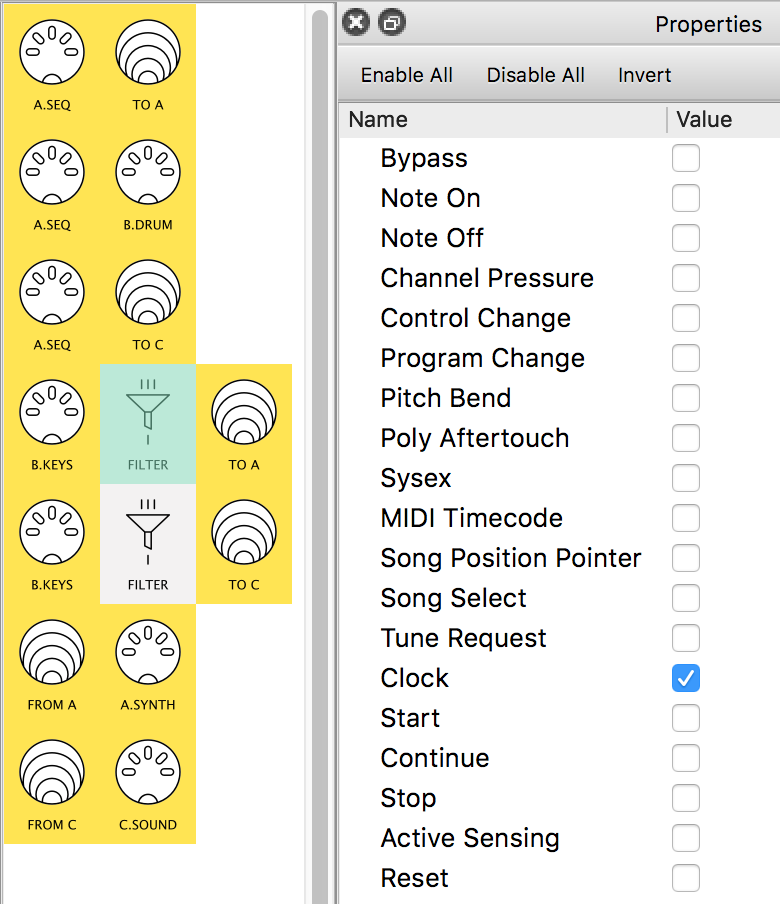
In Step by Step 04, we used a
Filterto stop any Clock messages getting through from MIDI-B.
Now: we want to do the same thing in two pipelines:
Add:Filterpipes to stop Clock messages where they’re not needed.
Now: we need to make sure we get the channels right for each device
SO we want to filter channels instead of events
There are two types of pipe for Filtering channels.
![]() more on the need to filter channels
more on the need to filter channels
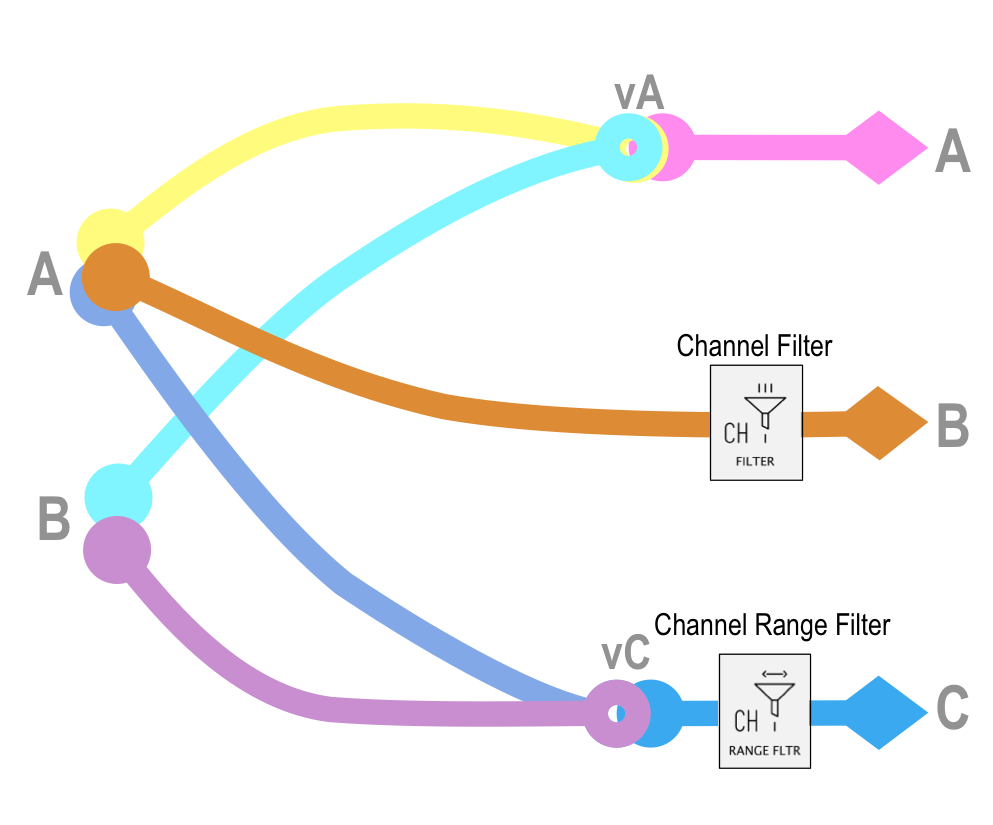
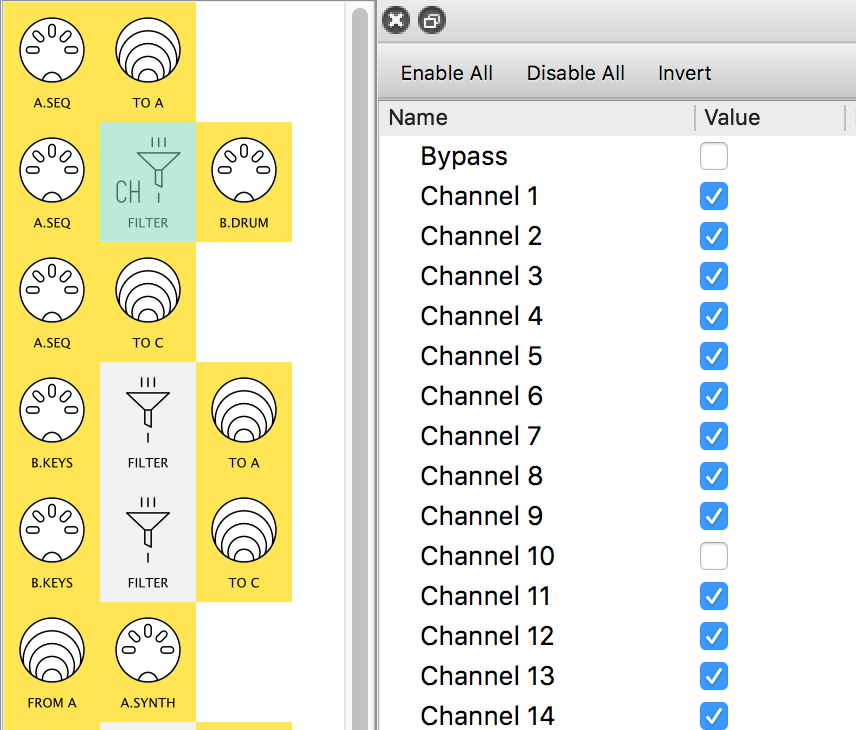
Let’s’ look at Channel Filter first…
…see how it works like Filter – we click the boxes we want filtered
Channel Filterfor theA→Bpipeline channels…
(…allowing only the channels we want to gotoB…)
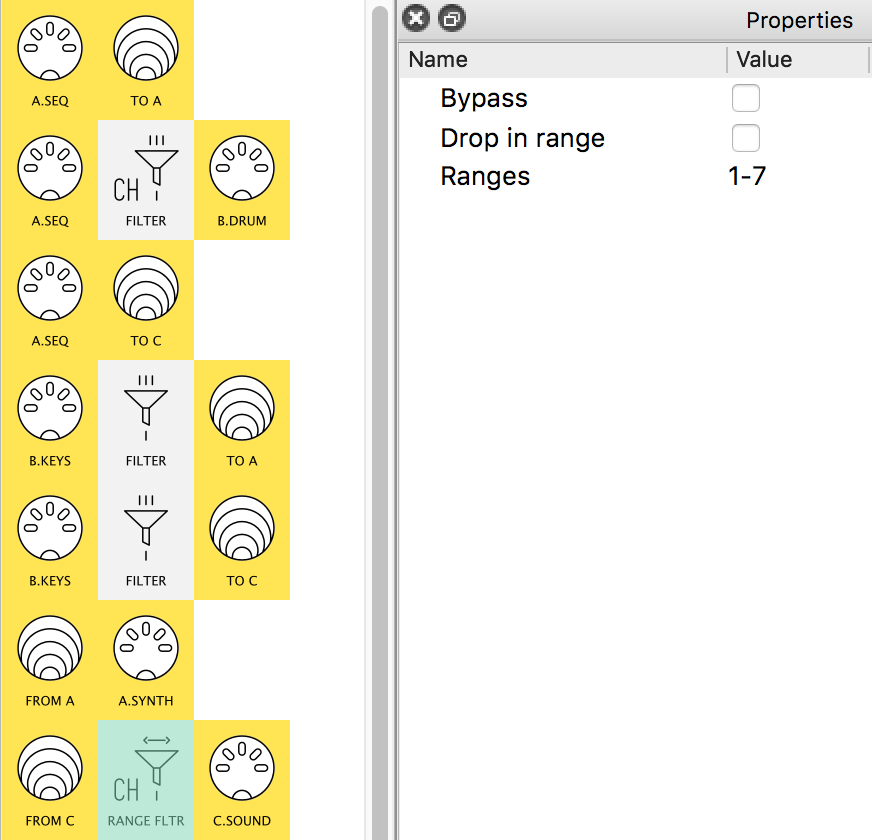
Channel Range Filter does the same job in a different way
A→virtual Cpipeline.
(…the sound module only wants channels 1-7)
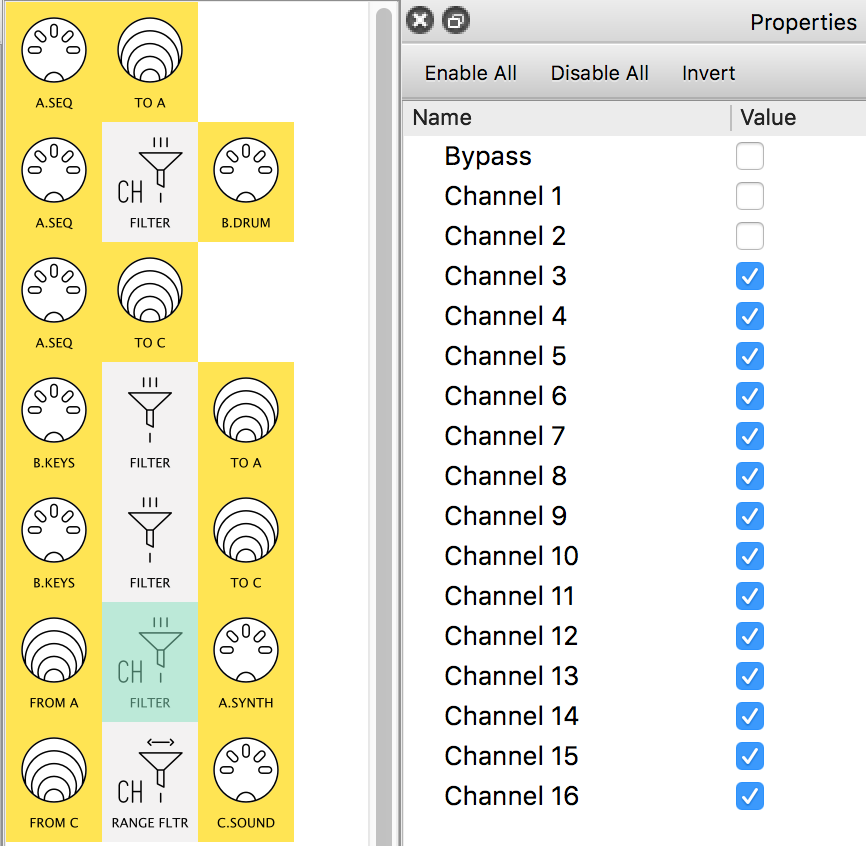
Channel Filterfor thevirtual A→Apipeline.
you might be thinking…
why two pipes that both filter channels?
Now we’ve set our channel filters, we’ll do a quick check that they are working
as you go on, you’ll likely form testing routines:
- keeping a sequence running as you move from pipe to pipe, looking at
MIDI Monitor- performing the same series of key-presses, or control moves
- listening to output for sounds that should (and shouldn’t!) be there
don’t forget
MIDI Monitorfilters !
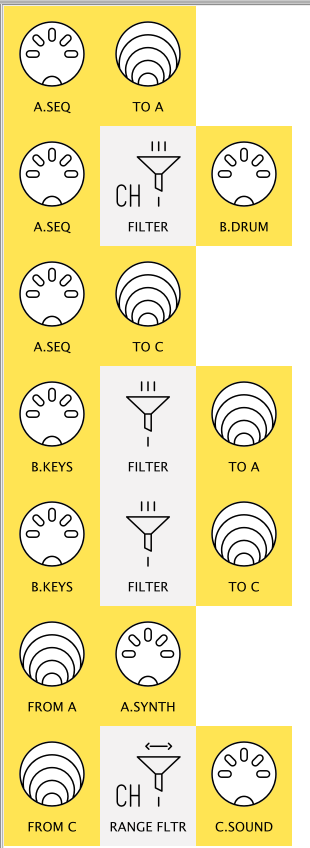
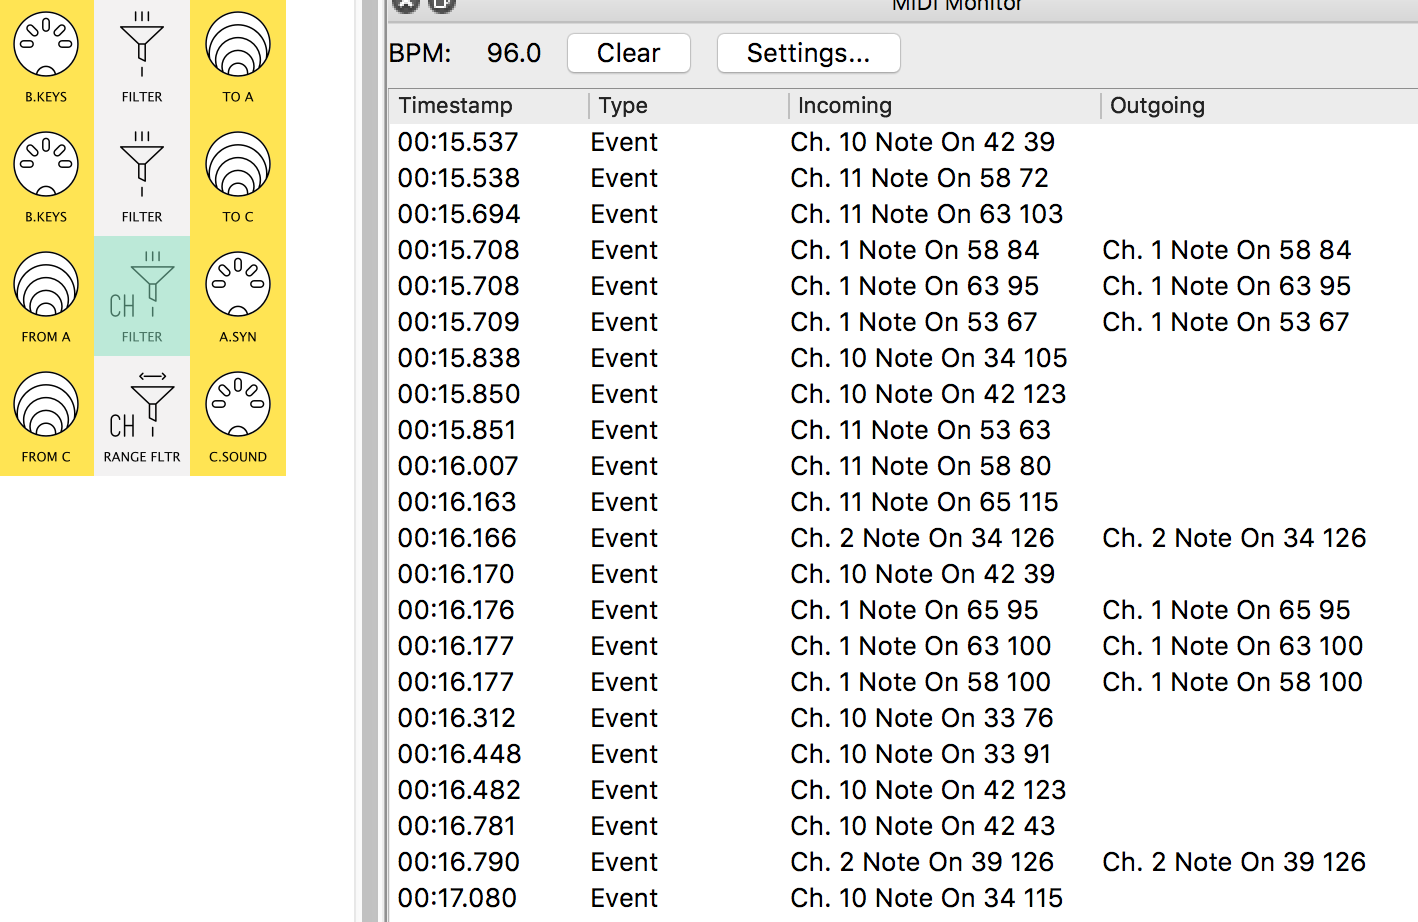
...of the three channel filters:
(we’ve set
MIDI Monitorfilters to show onlyNote onevents so we can see more of them!)
A.SEQ→B.DRUM…
…only lets Channel 10 through
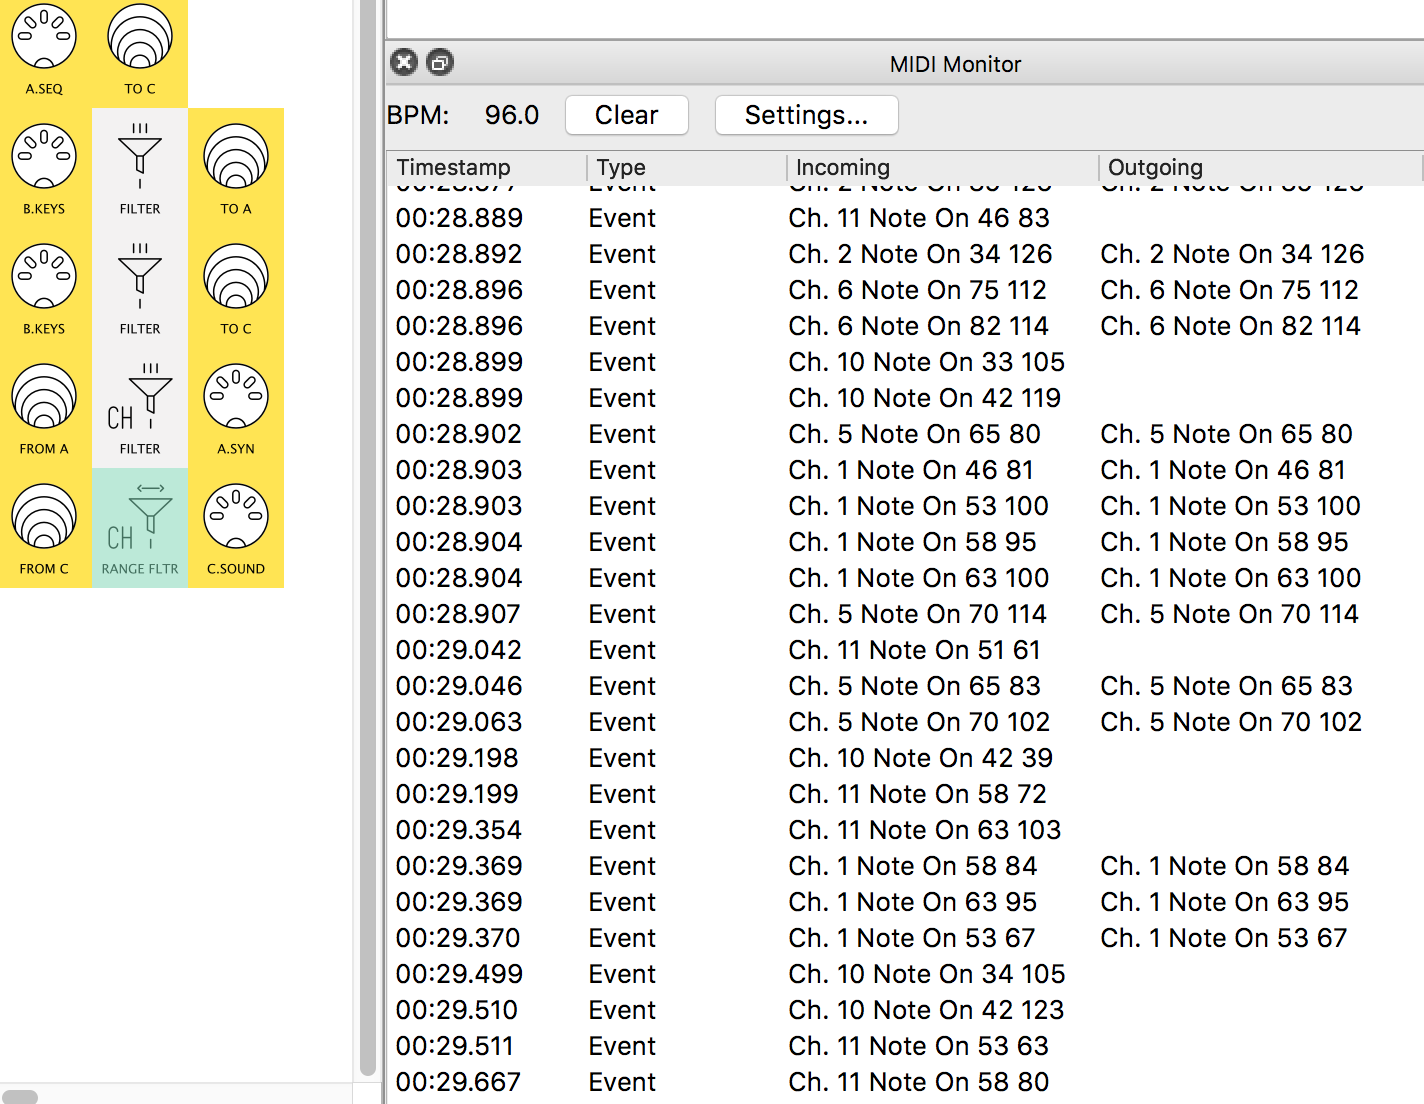
Virtual A→A.SYN…
…allows Channels 1 & 2
Virtual C→C.SOUND…
…No channel above Channel 7 is allowed through!

Now Save your patch with a name like 2In3Out_1.mhp
if you have sound gear attached to your version…
…have a play to learn how your new connections work!
…try clickingBypasson various pipes to hear the difference they make
After running the sequences with our set-up…
…and playing lead notes…
…and using the controller’s arp…
…and switching to channel 2 for the some extra bass lines
It feels like something could be improved…
Let’s try a split keyboard so I can play both at the same time
![]() more on…
more on…
...the need to filter channels...
Remember with old-style mergers and splitters, there was no way to do this.
Fortunately MIDI devices ignore channels they’re not assigned to.
So it’s not always necessary to use channel filters…
…but it can be useful…
…even if, later, you decide to remove some!
![]() why two types of pipe…
why two types of pipe…
... that both filter channels?
In ‘everyday’ use they do the same thing, so it’s a matter of which you prefer.
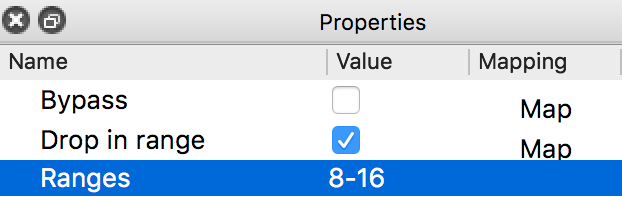
The real difference comes when you want to change the pipe with external controls
This is called “mapping”.
Channel Range FilterandChannel Filter:Imagine what will happen if you have a button…
…that will turn each ‘mappable’ checkbox…… the
Drop in rangeforChannel Range Filtercan be quite powerful and interesting:
flipping the role of the filter turning in on & off
we’ll come back to mappings quite soon…
Our patch so far:
Our initial “wiring” is ready for use with our Setup……with the channels we want directed properly.
Often a simple channel routing like this is all we want
Then there are those times when you want Midihub…
… to make more of our gear…
…and performance!
The rest of this activity is about this sort of Midihub customisation