Setting Mappings
The mapping buttons now have symbols to keep them compact:
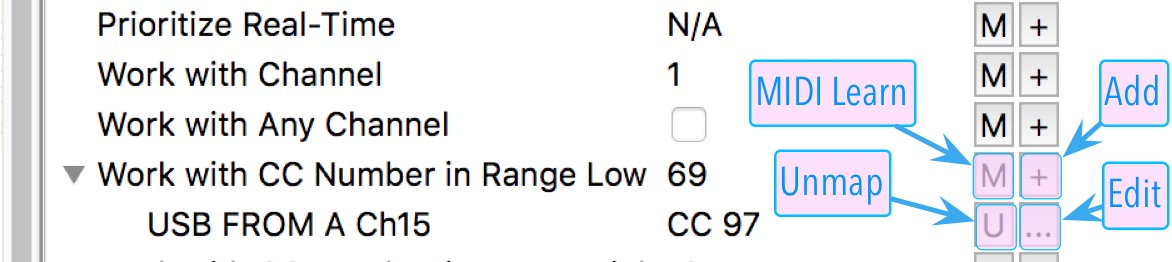
MIDI Learnonly works when Midihub is connected.
The other three buttons can be used any time (making it possible to write entire patches while disconnected)
When you have a lot of mappings to create, setting each of the four mapping properties by hand can be time-consuming.
Fortunately, the Dialogs are set up so you can effectively Copy & Paste mappings.
Here’s a sequence of examples:
You can set a virtual mapping that’s similar to an ‘external’ mapping
When connected, you can use the M button and turn a knob to MIDI Learn the properties…

(here we’re about to click MIDI Learn on Work with .. Range Low )
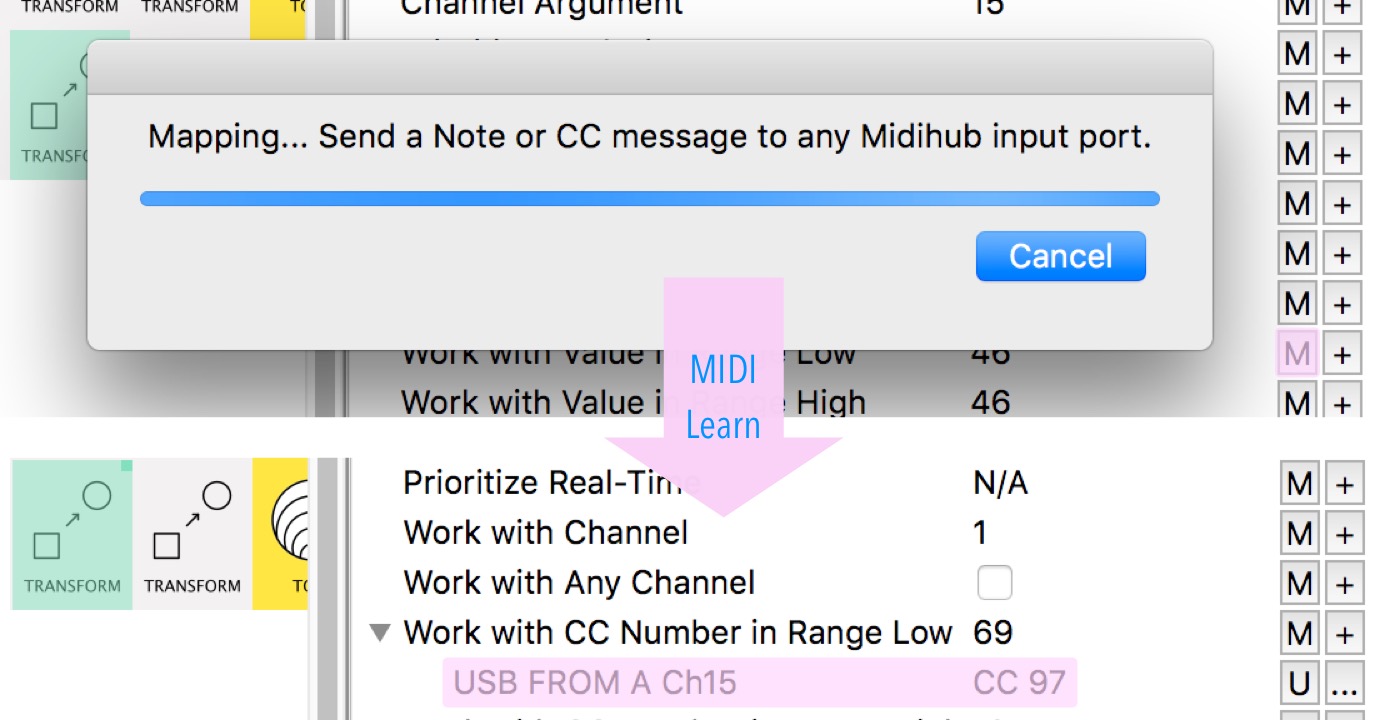
..then use
Edit to adjust them
Copying Mappings
An existing mapping can be ‘copied’ to another property:
Click Edit to see the existing mapping…
…and just click OK to ‘copy’ it…

…Now when you click Add on another property…
…those same values are now ready to assign to that ‘new location’…

(In this example both ‘Range High’ and ‘Range Low’ are mapped to the same message)
…or modify before assigning:
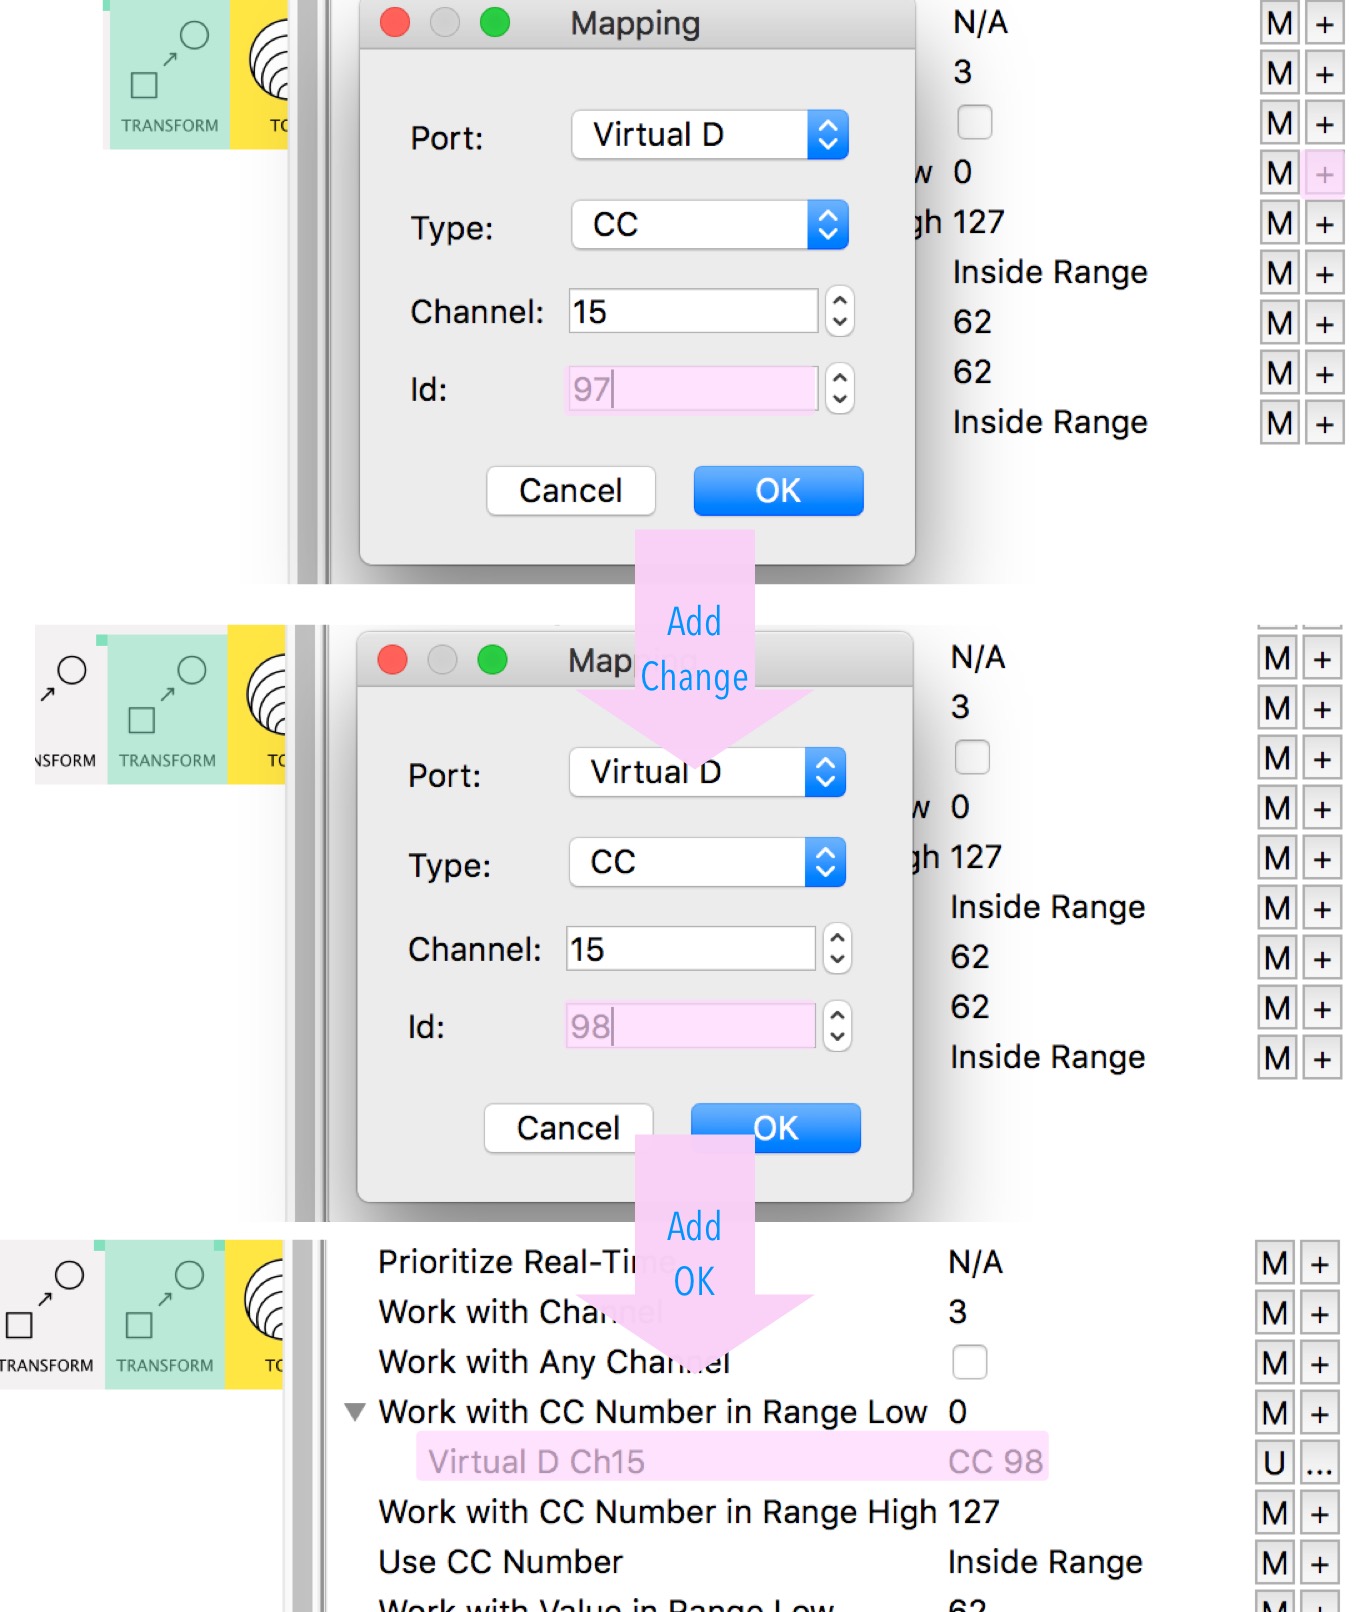
(In this example, the ‘Range Low’ property of the next pipe is now mapped to CC98)
With a little planning ahead it becomes easy to assign a whole bunch of mappings quite quickly.
(This is particularly true with virtual mappings: because we often can choose which CC#s, etc to use, we can make similar assignments only 1 or 2 small changes apart)
![]() On some OS’s (Win? Linux?) the selected button has a helpful red border all the while the dialogs are open. On Mac OS X you just have to remember. I dunno if @Giedrius can fix this; in the meantime Mac users get extra practice with the UnMap button..
On some OS’s (Win? Linux?) the selected button has a helpful red border all the while the dialogs are open. On Mac OS X you just have to remember. I dunno if @Giedrius can fix this; in the meantime Mac users get extra practice with the UnMap button..