I spent the Christmas holiday creating a Linux distro for the Raspberry Pi 5 called Pianoberry.
It’s sole purpose is to run Pianoteq as efficiently as possible.
Thanks to the Pisound sound card and a stripped down OS I got Pianoteq to run without any issues @ 96kHz with maximum internal sampling rate and standard 48 voice polyphony.
The main secret is of course the CPU power of the Raspberry Pi 5 and the inherent efficiency of the Pisound interface, but having the entire OS and application run in RAM also helps – In addition to Pianoteq getting the right preemption priority in the kernel.
Having it all run in RAM has another major bonus – turing off power while the system is running can have no ill effects since no data is written to the SD card at runtime. This is an issue of systems running Raspberry Pi OS.
Pianoberry is based on Tiny Core Linux – Resulting in a very small image (159MB).
That includes the 48MB Pianoteq binary
Modartt has kindly given me permission to redistribute the Pianoteq 8 Standard trial in the downloadable image, making it very easy to test Pianoberry – Just download and flash the image to an SD card.
Big thanks to Blokas for creating an awesome sound card for the Raspberry Pi, and for hosting this wonderful community – I hope my contribution will provide some joy!
Wow, this looks very helpful so the effort is very much appreciated. Is there a recommended way to activate the included Pianoteq trial to the full version in pianoberry? I happen to have a standard license ready and am eager to try it out to see if and how much it improves latency compared to my current pisound/pi5/patchbox installation.
Do you think your findings (run in RAM, preemption priority) would also improve performance on a standard patchbox os?
I’m working on licence activation right now. Having a full licence would require you to build Pianoberry because the Pianoteq trial binary differs from the full version. The trial binary cannot be activated.
How much it improves is probably hard to tell if you already are below 3 ms. The 1.33 ms latency I got is mostly for bragging rights , but I guess a seasoned player could perhaps tell the difference. A good analogy to how much difference this actually makes is to look at how far sound travels in 1 ms. People are generally surprised at how much latency there are when you move just a single meter from a loudspeaker.
Running everything i RAM is not always practical. RAM on the Raspberry Pi is at a premium, but for application specific tasks like this it’s perfect. The speed gain is not the best part though; the power outage safety is the best part of the deal.
Preemption is a pretty contested topic in the kernel community – Especially with regards to audio. My take is that there’s not much to be gained going to a full preemptive kernel, since audio gets very good priority on a standard kernel. Then again – it couldn’t hurt, right?
For a multi-use system, few things can beat the Debian-based Raspberry Pi OS. I think familiarity for the developers/users trumps the microseconds gained from my setup.
What I did makes more sense when it’s a single application system.
Good stuff! By the way, is it really necessary to bake the serial into the image? Reading it from a text file on the SD card would make it way smoother compared to building the SD card image, similar to how you can override settings in config.txt and cmdline.txt on your computer for regular OSes prior to inserting the SD card into the Raspberry Pi.
I agree 100%, but I don’t have permission to redistribute the full version of Pianoteq in my source code, so the user has to build their own image anyway to get the binary “baked in”.
That’s a good thought, and I will absolutely look into that.
It will come at the cost of a ~50 MB larger image, but that’s neither here nor there.
It’s advantageous to keep the boot partition small, but +50 MB isn’t that bad. I will run some tests tomorrow!
I have updated the project to work like you describe.
No need to build the image if you want to activate your licence.
Place your Aarch64 Pianoteq 8 binary in the root of the SD-card and paste your licence key in config.txt.
The Raspberry needs to have a wired internet connection on first boot. After activation is done it no longer requires a network connection.
I am not clear if Pianoberry allows the pinaoteq GUI to be displayed on a screen? for example, to fine tune the piano parameters before running headless.
Also, is there any advantage to running it on NVME?
My thought when setting this up was that each Pianoberry image is built for a specific standalone instrument. The end goal is to have an instrument that looks and works like the real thing; turn it on and play – Free of option paralysis.
Pianoteq has a JSON-RPC server that can be enabled, but that would require Pianoberry to have network access. This interface lets you configure most of the things on the fly. It would require a purpose built WEB interface for ease of use. You can enable this with the --serve [IP:]PORT command line parameter.
I’m planning to use Pianoberry for a custom standalone electric piano. For this instrument I will create presets on my Mac and add those preset to the Pianoberry build. Presets can be loaded with the --open command line parameter, or you can set up MIDI mappings to browse presets.
I already load a custom MIDI map in the current Pianoberry build where I have mapped felt thickness and dampening pedal to rotary encoders on my MIDI controller – This is just as a proof of concept.
Take a look at the Pianoberry build script and see how it’s put together.
Ok thanks. Seems the best thing is to run Pianoteq in the normal way on a laptop etc. with access to all the GUI sliders, and then once I’ve got the perfect preset, just set that up in Pianoberry.
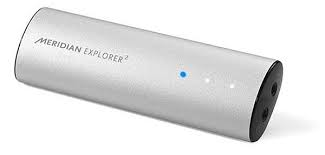
One more question. I already own a USB DAC (Meridian Explorer 2)
I was wondering if Pianoberry would work with my Keyboard connected to the PiMidi HAT via a MIDI port, and then output via USB to my existing DAC? What kind of latency would I expect?
You could absolutely make that work, but it would require you to find the device name of the Meridian Explorer 2 and edit the Pianoteq config before building Pianoberry. There will probably be problems with artifacts/latency and you will need to tune buffer size and sample rate to get it working as smoothly as it does with Pisound.
Awesome project! One question (from a newby!): How could I configure Pianoteq to my likings? I currently have a special velocity curve for my keyboard and have applied several EQs etc. How could I set that as a parameter in Pianoteq or as a a preset without a GUI? Can this be specified during the building process?
Also, is it possible to connect a class compliant USB midi keyboard via USB?
Thank you very much for pointing me in the right direction!
Hi, I’ve have a pianoteq licence but have only got a raspberry pi 4 - will this work on that platform if I reduce the sample rate a bit to say 48 kHz and reduce the polyphony ? Thanks.
Is the latency value you quote (1.33ms) based on that given by Pianoteq? Or are you measuring it yourself in some way?
I’m running Pianoteq Pro on a Pi5 (64-bit RP GUI OS) with a Pisound card with a reported latency of 1.3ms.
It runs fine - no dropouts - and feels good to play - no noticeable delay between hitting the note and the sound - but I take these latency values with a pinch of salt. What, exactly, do they mean?
I did some measurements some time ago measuring the time between the sound of my finger hitting a key and the onset of the sound from a loudspeaker, using a couple of microphones and a digital oscilloscope. Here’s the joke though - I can’t remember what I found! I’ve probably got the files somewhere and should look them up. But, anyway, I should repeat the experiment with Pisound because I wasn’t using it at the time I did it before. When I do that I’ll post up the results here.
My preferred way to use Pianoteq is ‘headless’ on a CLI OS, using my own software to control it. But one reason for this is that I hate the Pianoteq GUI - load of absolute rubbish in my view. I’m not sure, though, that I get better performance this way. The performance seems extremely good however I do it.
What Pianoteq is reporting on latency can absolutely be trusted.
Pianoteq uses direct DSP, writing to a buffer. The latency is a simple calculation based on sample rate and buffer size.
This latency does not include MIDI input latency which I understand to be a given.
MIDI latency depends on if you are using USB or DIN and on the quality of the drivers.
I’ve set up Pianoberry to use MIDI DIN because it provides less latency given a good keyboard.
I could not get the same performance as you report with a GUI – I could only achieve it when tweaking the whole system and running headless.
You are very welcome to try out Pianoberry and see how it performs. It’s not a product; just a free and open source project for enjoyment and freedom of experimentation.
My use-case for this project is to create a stand-alone instrument without any kind of menu – Just like a real piano.
I would configure Pianoteq on a standard GUI system and move the config files to the Pianoberry project and make a custom image. This is how I envision using it. It’s not a finished product, but a project you can build upon to create a stand-alone instrument. It will require some technical knowledge.
Connecting a USB MIDI keyboard is absolutely possible but would require you to edit the configuration and building Pianoberry for your needs.