Adding an Arpeggiator
development: 10 testing: 2 play: 6+
…when I turn the controller’s Arp is ON…
… the bass notes also become part of the Arp pattern
So we can’t use the Arp and play Bass at the same time.
How do we work around this?
We have several options:
… just NOT play bass when Arp is ON…
sometimes we decide to work within the limitations of our gear…
…but otherwise, we’re going to want to use…
… Midihub’s powerful Arpeggiator pipe.
That gives us at least two more options:
… make a SECOND keyboard split…
… and make a part of the keyboard “Arpeggiator only”
This would be possible – but limited – with 37 keys…
…OK with 49+ keys (depending on your style/project)…
…but probably not that viable with only 25 keys!
This option would also allow some lead notes and a separate arpeggio…
OR
… CONTROL the Midihub
Arpeggiator…
… using the MIDI controller to turn it on and off…
…and maybe more!
Depending on what kind of keyboard controller you have, (and how it fits with your playing style), this would give you…
- …an arpeggiator over the “high” notes when you want it
- …or just a plain split-keyboard when you don’t!
- …but not both at the same time
Before we try either option:
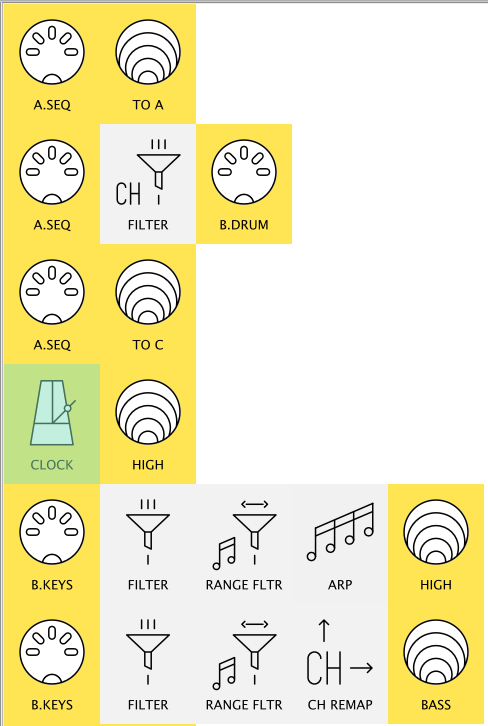
Let’s try an Arp into the “high” line somewhere and see how it works!
(we can always move it later)
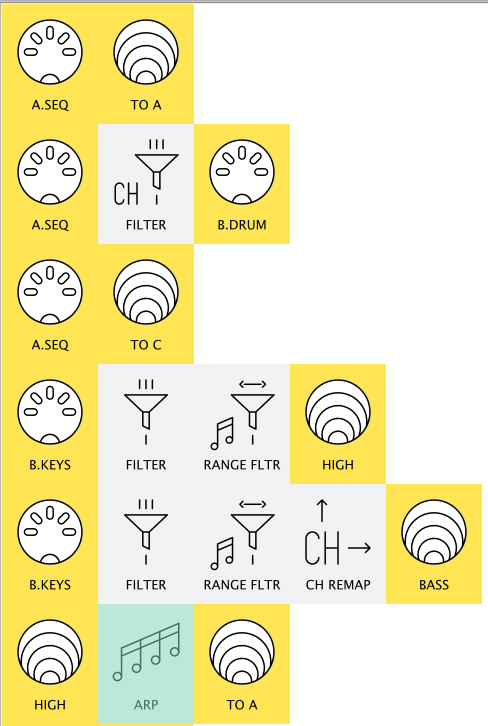
First: drag an Arpeggiator pipe into the
MIDI-B→Virtual H/HIGHline…

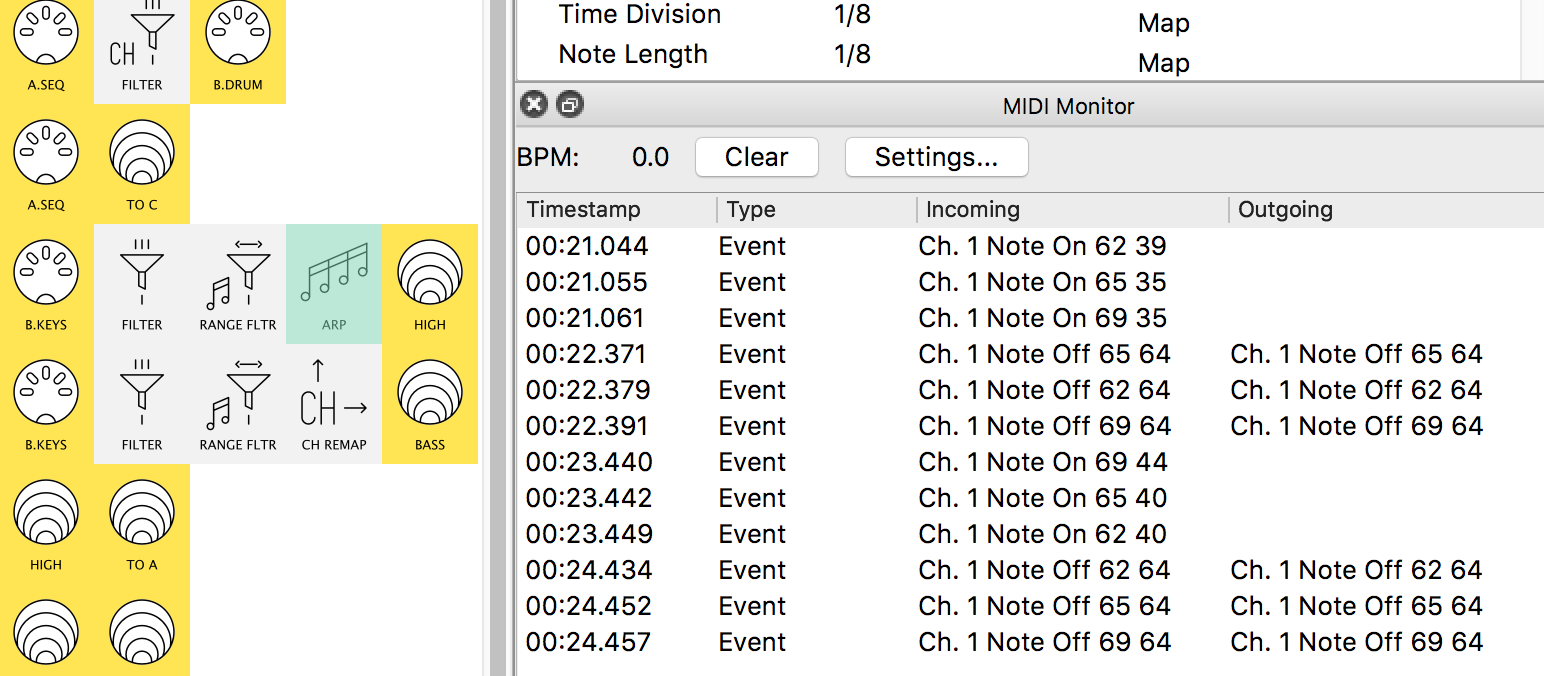
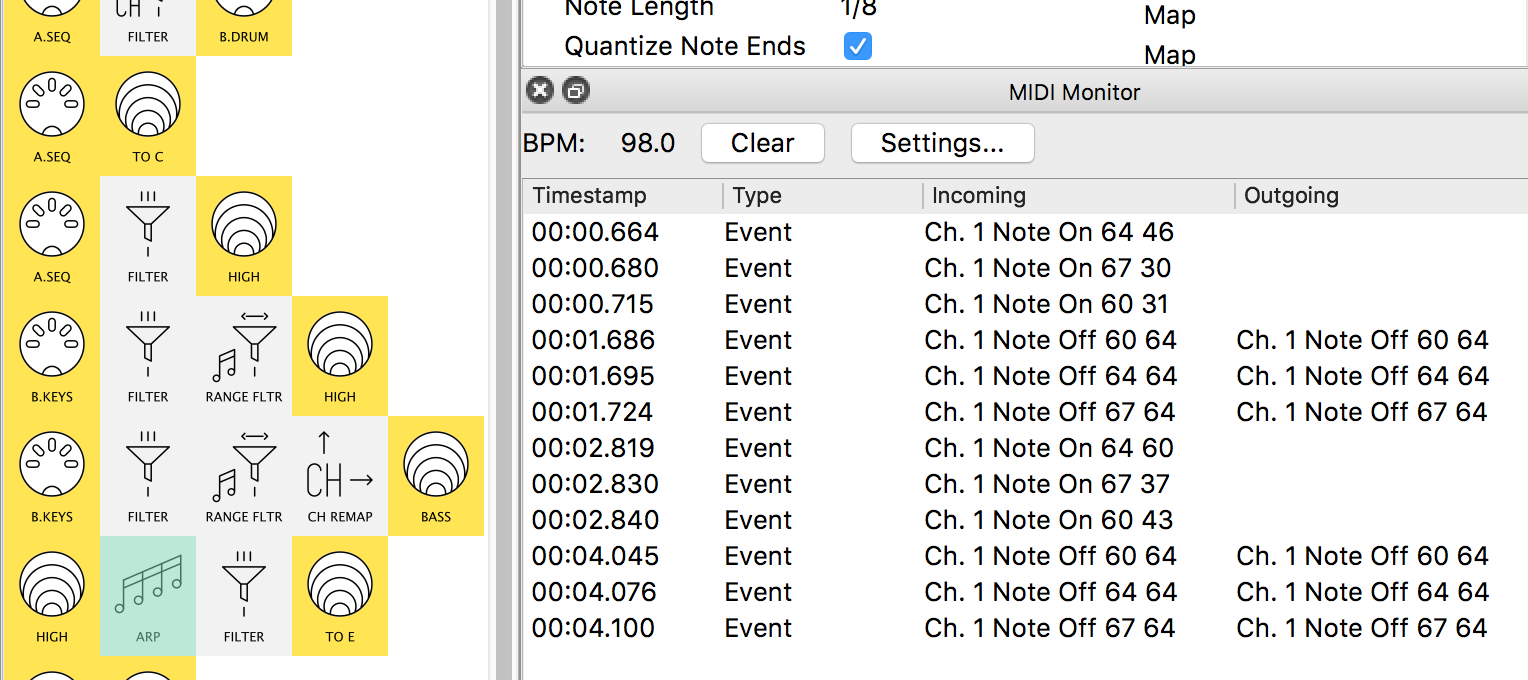
MIDI Monitoras you hold a chord and release it…...you should find:
it doesn’t work!
Selecting the Arp pipe…
… theMIDI Monitoronly showsNote_offevents getting through…
… and selecting the OUT pipe after it……confirms this
Why?
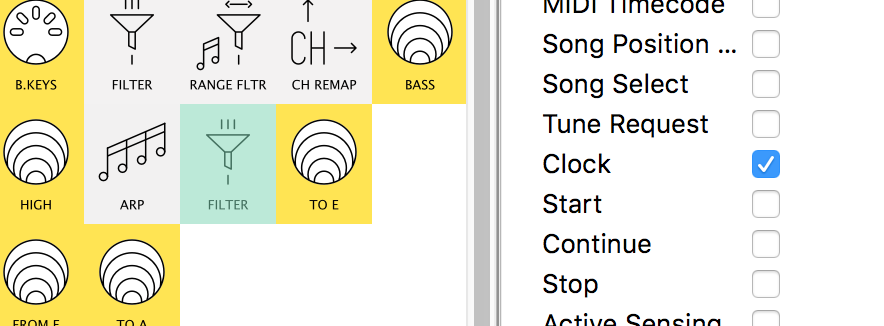
the answer is in theContext Helppanel forArpeggiator:“The notes produced are quantized to the tempo, so MIDI Clock messages must reach this pipe for it to be able to do its work.”
and at the moment we have no Clock going to that pipeline!

So we need to get clock messages through to the Arpeggiator…
…no matter how you decide to build your Arp!
We need to provide a clock like this:
MIDI-A→Virtual H/HIGHpipeline…
…and add a filter to only let Clock messages through…
Now: let’s join things up!
we need add new pipeline to hold the ARP pipe…
…so it can receive Clock messages to work
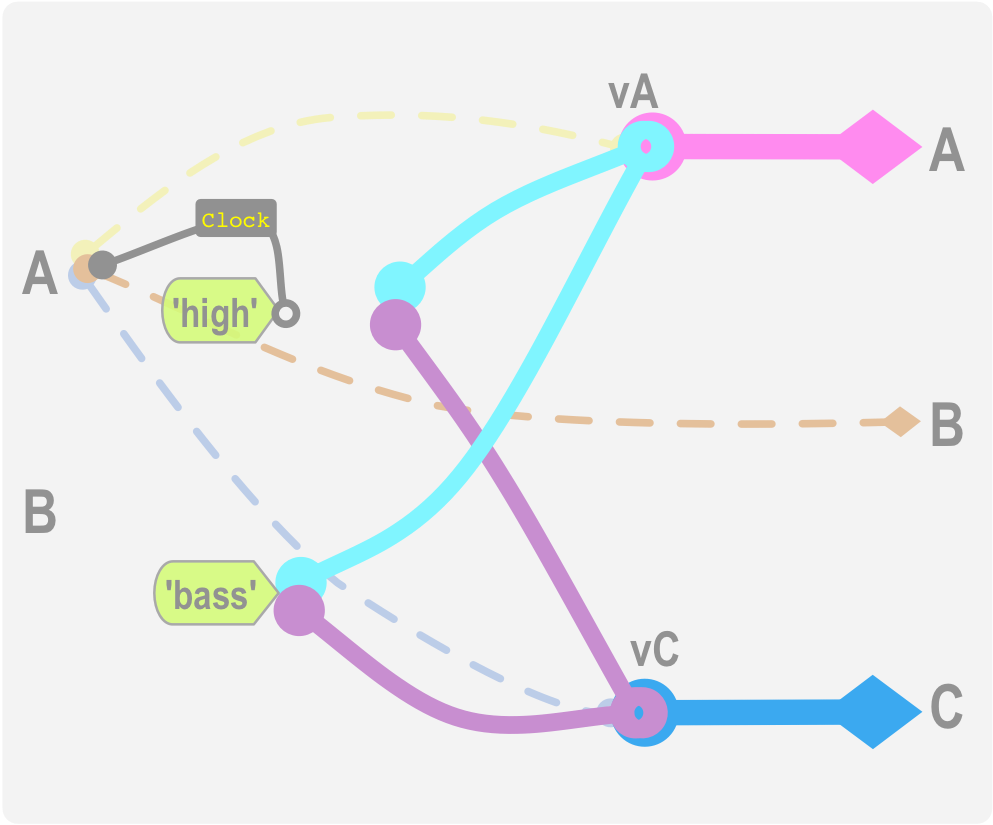
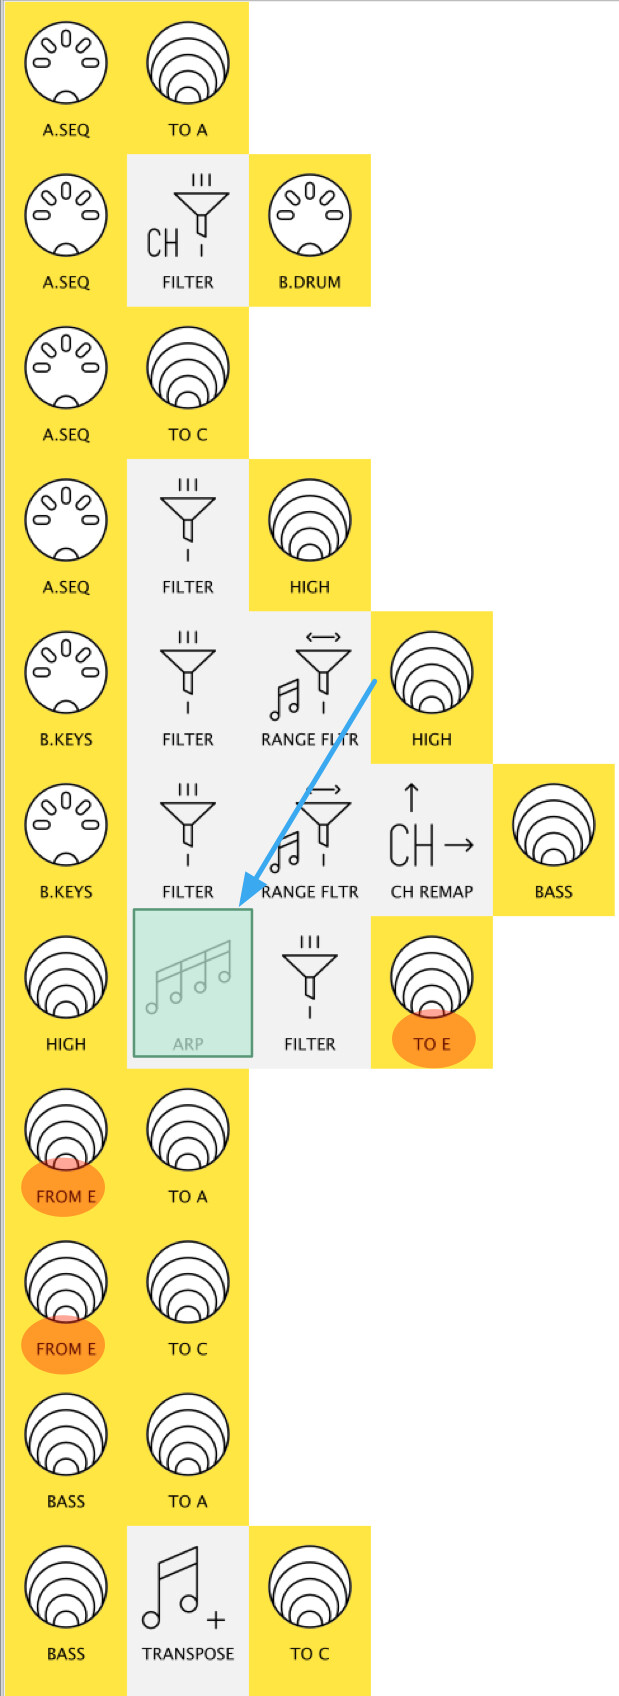
Here’s the change we want in a simplified diagram:

let’s go through the steps…
…so theArpeggiatorcan receive the Clock…
…coming intoHIGH
…
…we want to send theHIGH→Arpeggiatornotes out to a new Virtual pipe…
(…we’ll useVirtual E…
…so a newHIGH→Virtual Epipeline)…then we’ll connect
Virtual EtoVirtual AandVirtual C!Your changes should look like...
…this:
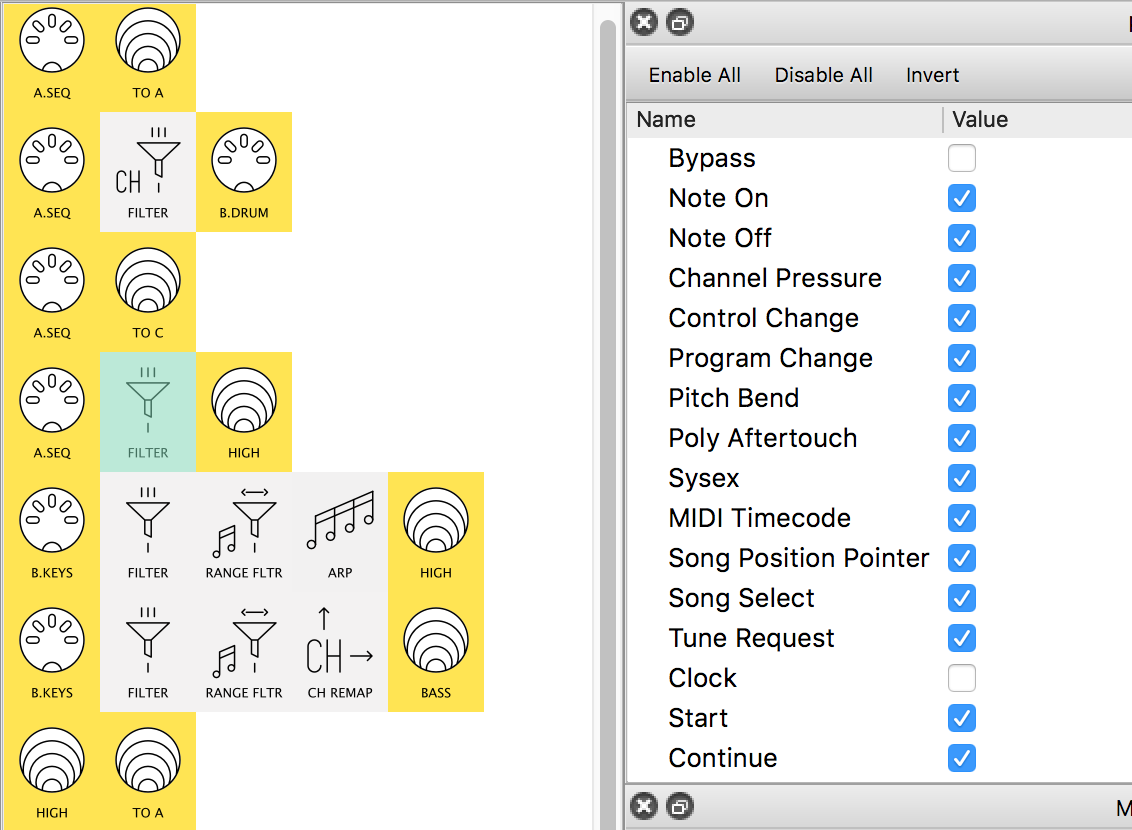
We’ve made a few changes here:
Arpeggiatoris now in a newHIGH→Virtual EpipelineHIGH→Virtual AandVirtual Cis now…
Virtual E→Virtual AandVirtual Cand ……did you spot the new
Filterpipe?it is needed because:
- we need clock messages to make
Arpeggiator- but we don’t want them to conflict later
See: it’s like our earlier
Filter, butInverted
MIDI Monitoragain when you hold a chord…...you might find:
That selecting the Arp pipe itself…
… still shows only
Note_offwhen the chord is releasedBefore you get concerned…
… try selecting theFilterpipe after it……this shows the Arpeggiated notes just as expected!
some “Clock-reliant” pipes…
…likeArpeggiator,Note Repeater, andDelay…
… give unexpected results inMIDI Monitor. It’s a confirmed bug that will get fixed.When this happens
Monitor theIncomingevents at the next pipe…
…to see the realOutgoingevents fromArpeggiatororNote Repeater/Delay

It’s very useful to be able to Monitor what events are going through a particular pipe…
…but it’s also important to hear what coming from several outputs.Sometimes it’s also useful to cut off certain inputs too…
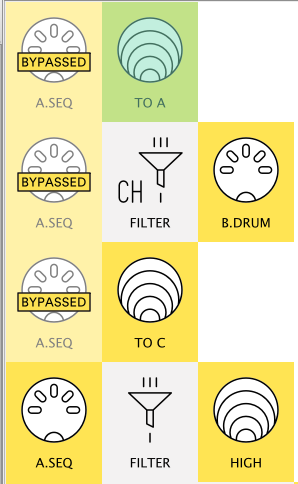
to allow us to concentrate on the input that we’re really focussed on.Here we’ve stopped everything from
A.SEQ…
…apart from the Clock for the
HIGHpipelines.
We know we’ve still got…
…decisions to make and…
…more to build
But take some time to…
play with the patch so far:
- play some left hand bass while holding right-hand Arp chords
- use
Bypassto listen to combinations of the ‘voices’ onMIDI-AandMIDI-C- and explore the
Arpeggiatorpipe…
(…if possible with a ‘Mouse Hand’ and a ‘Chord Hand’…)The ARP pipe has quite a few features:
some are found in many arps:
- like
Time Divisionand maybe…- …
Note LengthandSwing
…but others are more unusual:
like maybeAccentand the ChordType……and not many arps have:
Repetitionsand- an
Octave Rangeof -7!
(maybe the arp should be on the bass notes!)
Now Save your patch with a name like 2In3Out_5.mhp…
…it will be the starting point for both of the next developments!