Now we’re ready to start…
..we’ll be evolving a patch together in several stages……taking decisions
…and making it more complex as we develop
So be ready to…
…get your gear together…
..pour yourself a cup/mug/glass..and let’s get going!
Planning the Patch
development: 6
To start building a working patch using a 2-in-3-out setup we need to plan what messages we want to send where…
…and that depends on what we want to do!
Now… to decide what routing you want…
- …decide what device is going to…
- …link with what device
- …on what channel
Here’s our gear:
INPUTS
Devices connecting to Midihub Inputs
We’re going to use the sequencer and KeyStep37 MIDI controller like before.
Follow along in your own way with your gear:
- If you have at least one device that can send events on 3+ channels at the same time, that will be great.
- If that device can send Clock too, even better!
OUTPUTS
Devices connecting to Midihub Outputs
It will be more rewarding if you have three devices…
…that can respond to MIDI input and make sound too!But if you’ve just got one device with two ‘voices’ that will be good…
… and if not, useMIDI Monitorand your imagination!We’re going use the a synth on 2 channels, a drum-machine and a multi-channel sound-module
So our setup is like this:
See: the Sequencer will send messages to all 3 audio devices…
… but the MIDI controller doesn’t need to connect to the Drum Machine.
(Also: notice two of the audio devices have channels we don’t want to use)
Take a few minutes to sketch out your devices…
(including imaginary audio outputs?!)
…with their channels, event types, etc
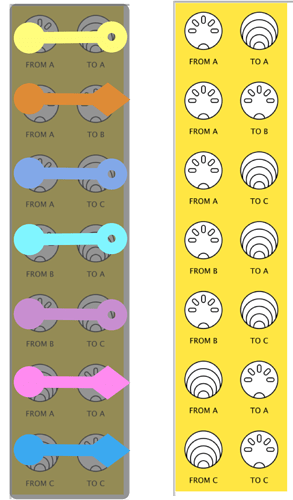
Our ‘Set up’ has the same connections…
…as the “MIDI Merger Splitter” we saw above…
… just one of the connections is switched off
Now picture the Midihub connections…
...there's more than one way of doing it...
one way would be to join directly to the outputs…Or, like before, you could bring pipelines together with virtual pipes to help monitoring…
Or you might design a completely general and re-usable 2-in-3-out patch…
…and just disable/delete the inputs you don’t want…Each “wiring” has it’s pluses and minuses
With Midihub, you’ll often find you have a choice about how to get what you want.
more on Midihub choices
We’re going to use the second option as a middle way:
Now: build the patch…
Now
Saveyour patch with a name like2In3Out_0.mhp
(we’ll be making several versions as we go on)In upcoming sections , we’ll start making decisions about how to make sure the right messages go to the right place
![]() : more on…
: more on…
Midihub choices:
As you saw above, there are a number of ways of even routing a patch:
- the first is very simple and saves virtual pipes but isn’t very flexible
- the second is more flexible. It could be ‘reduced’ to the simpler version when everything is completed
- the last is super-flexible. Some users like to build ‘template’ patches –especially if they’re using the same kit for several patches
As you learn more about Midihub, you’ll also find that you can do the same job with a choice of different pipes.
The Midihub Editor makes it easy to change your mind –and your patch– as it evolves.


