Please help, tell me how to make pcm1808 work with patchbox
@spike160490 I’m not sure how much help we’re going to be able to give you on this. Since the Blokas devs don’t have access to the particular hardware that you’re using they won’t be able to assist with your question.
What I would suggest, however, is to see if you can get the device to work with the default Raspberry PI OS according to the instructions on the Adafruit site.Then once you have that working it might be clearer how to implenent on Patchbox.
I assembled the device according to this scheme Creating an audio input/output board for Raspberry Pi, Jetson Nano (PCM5102A+PCM1808) | by Kentaro Mitsuyasu | Medium, it says what to connect it necessary according to the adafruit instructions, but I get an error, if I understand correctly I need to make an overlay but I don’t know how to do it, maybe you can help me
I also tried this scheme GitHub - AkiyukiOkayasu/RaspberryPi_I2S_Slave: General I2S slave I/O device tree overlay for Raspberry Pi.
, but only outputs appear, there is sound but no input
Unfortunately I’m not going to be of any help. I don’t have any experience with these types of devices or making an overlay.
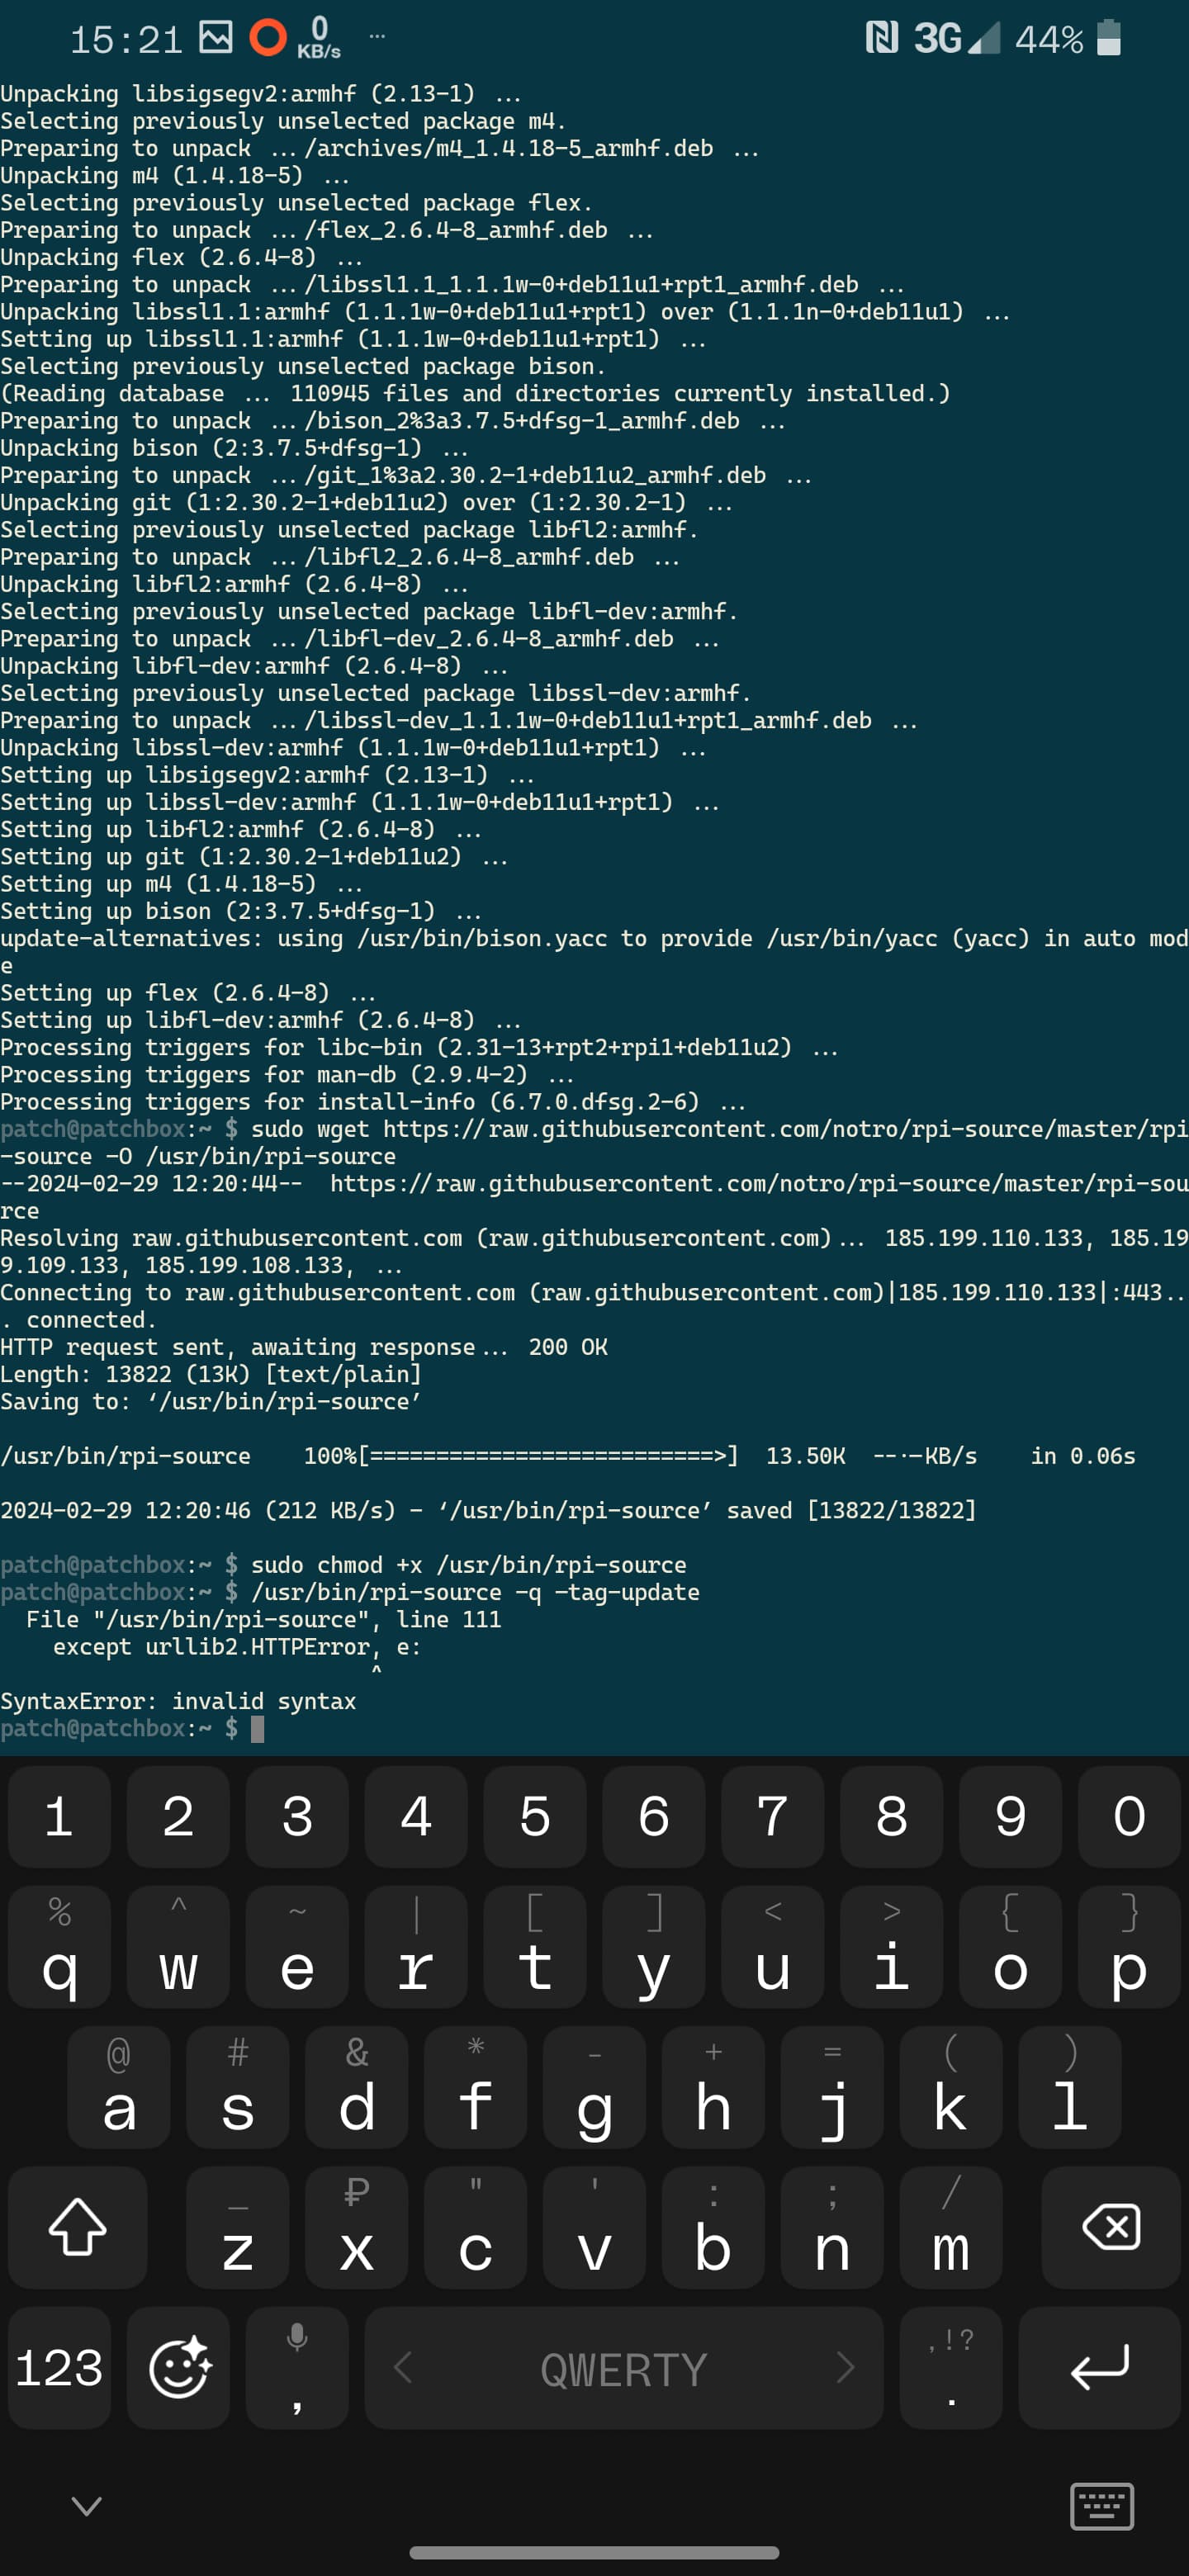
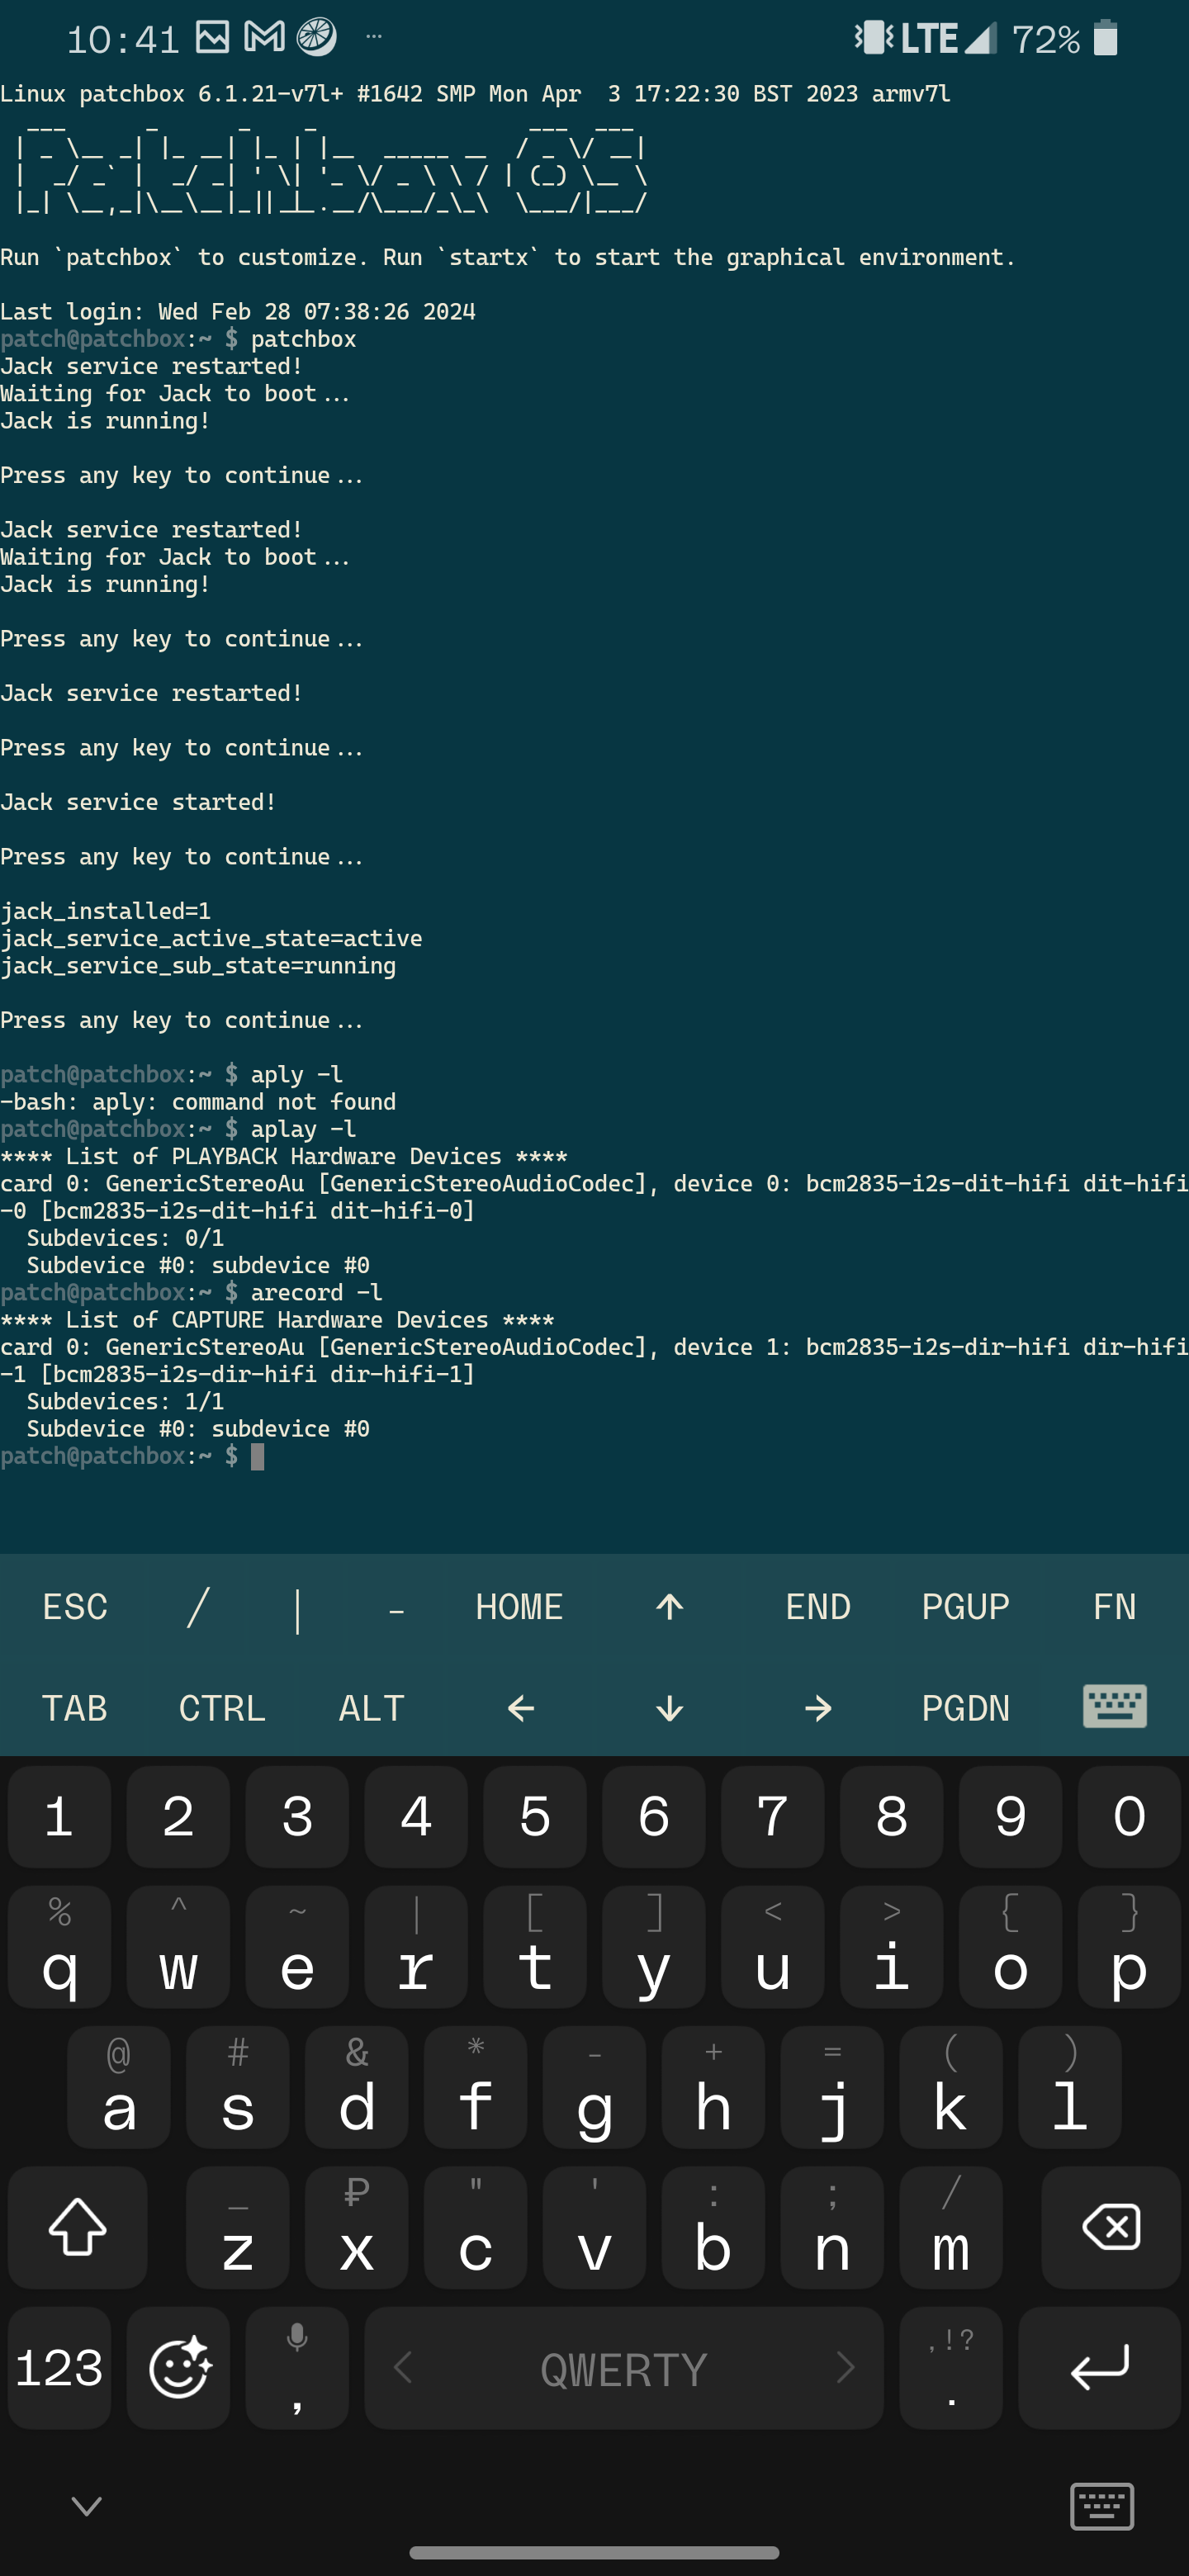
Hello spike, it seems that the script “rpi-source” is written in python but use a syntax of a different version … the error
“except urlib2.HTTPError, e:”
is because the comma is not recognised in the python syntax. try to edit the rpi-source script and change the line 111 in
“except urlib2.HTTPError as e:”
using as instead of comma, and relunch the script to see if there are any other errors.
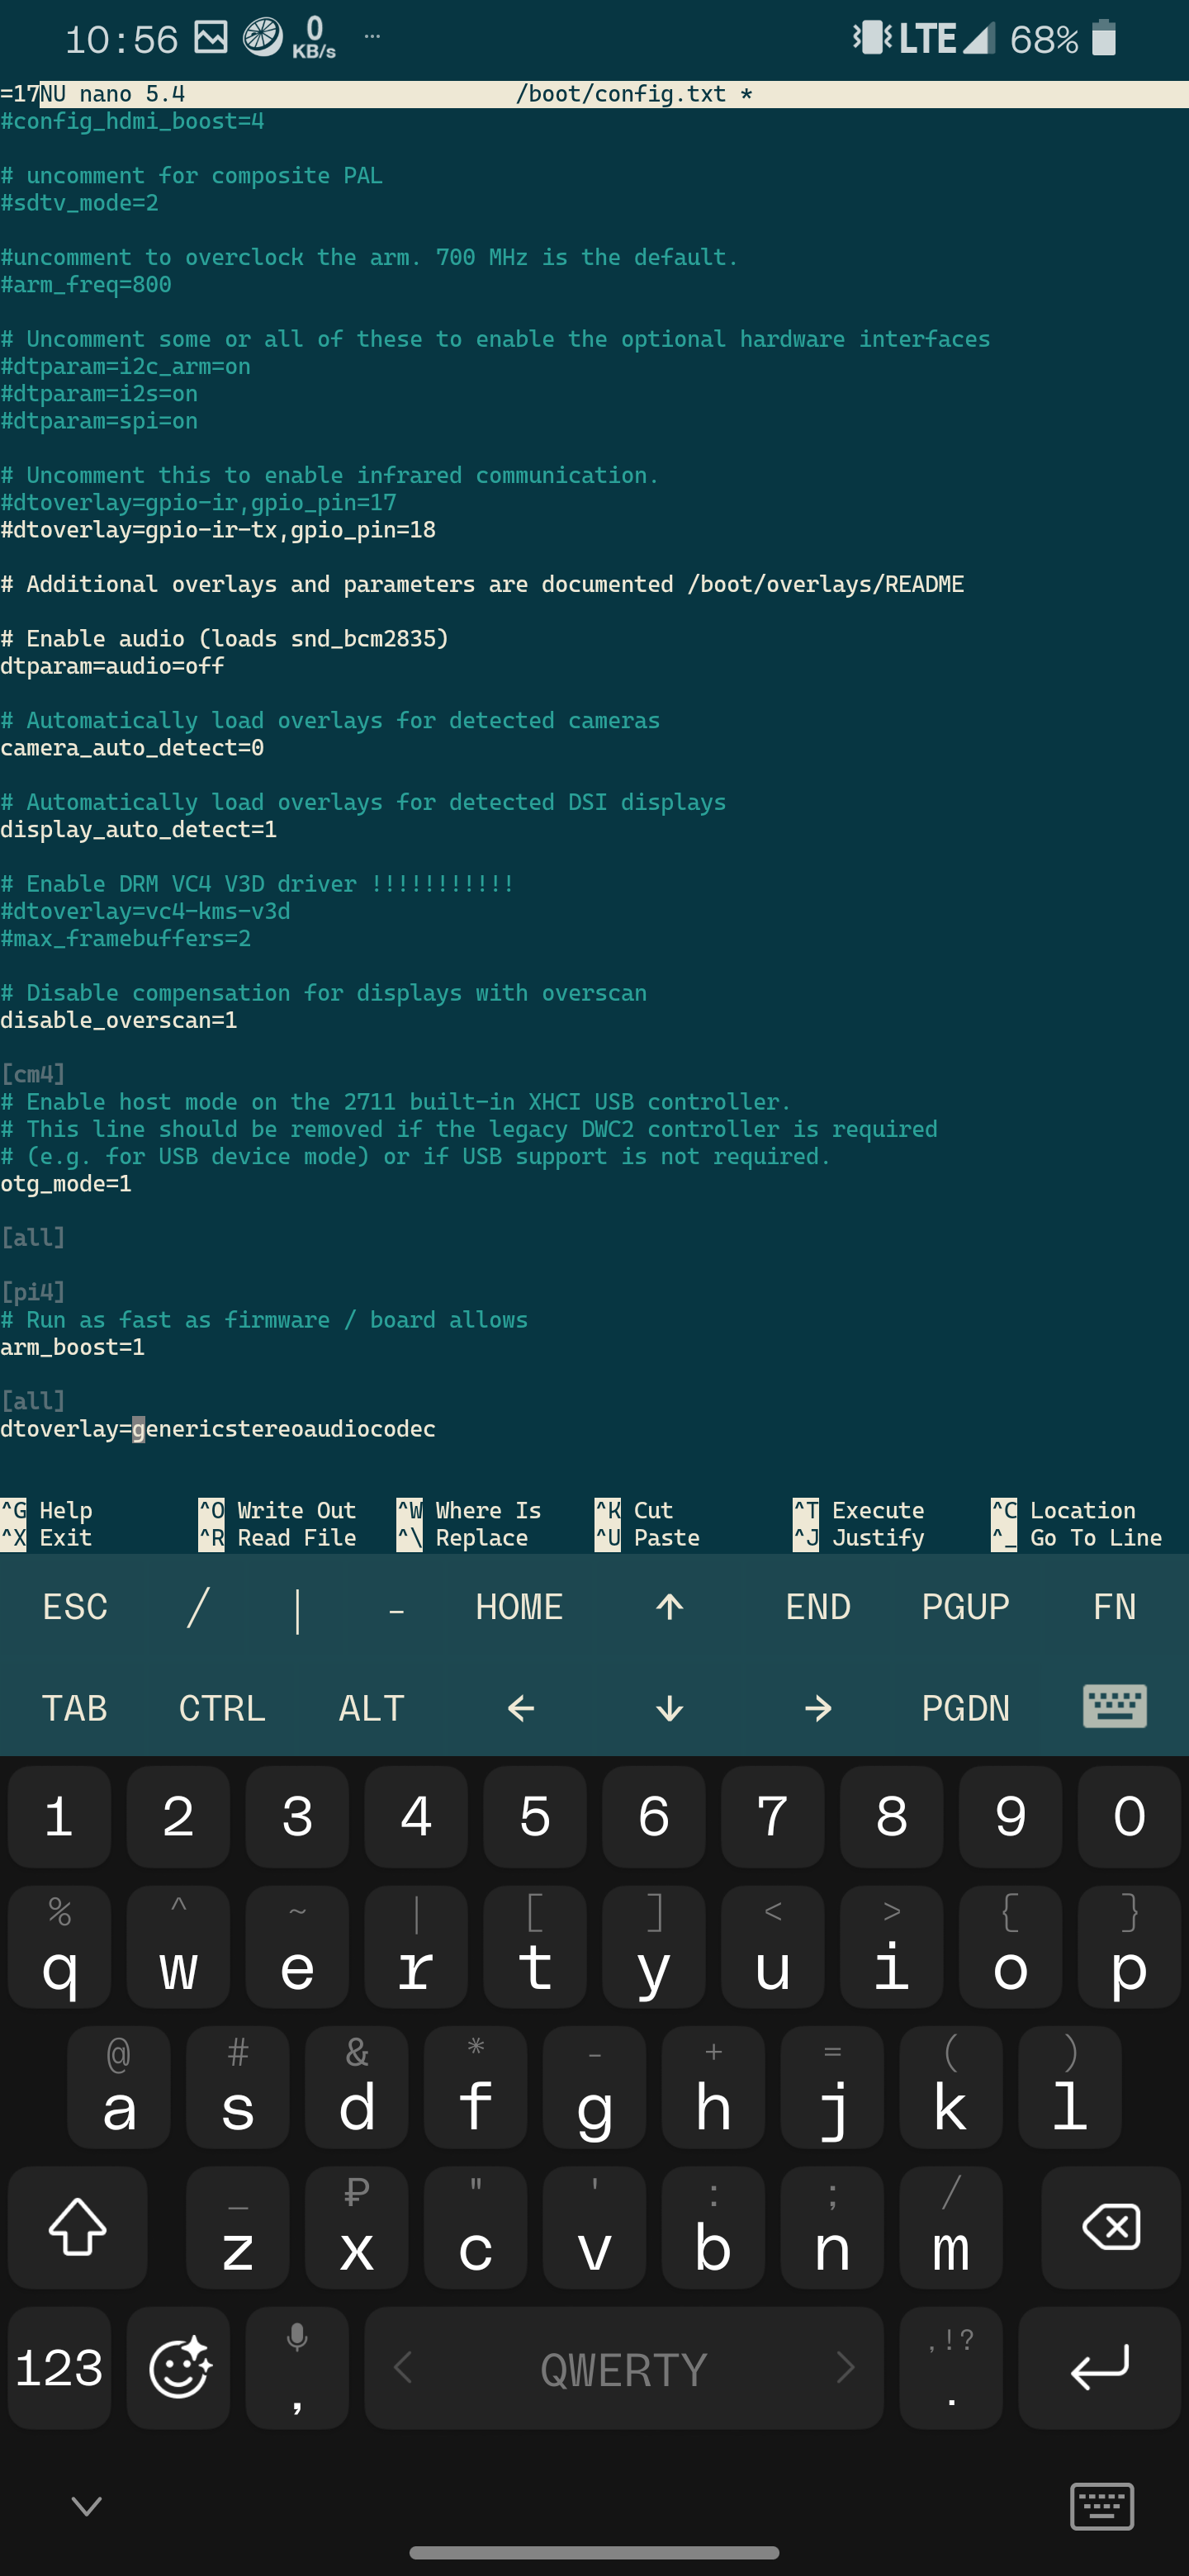
In Raspberry PI there is a config file to enable specific overlays, you can find it in
/boot/config.txt
I use an hifyberry board and i have enable it in that file with
Additional overlays and parameters are documented /boot/overlays/README
dtoverlay=hifiberry-dacplus
I don’t know what is the driver name you have to use after the keyword. “dtoverlay=…”
Look to the documentation of your board or if you made that yourself use the name you invented for the product.
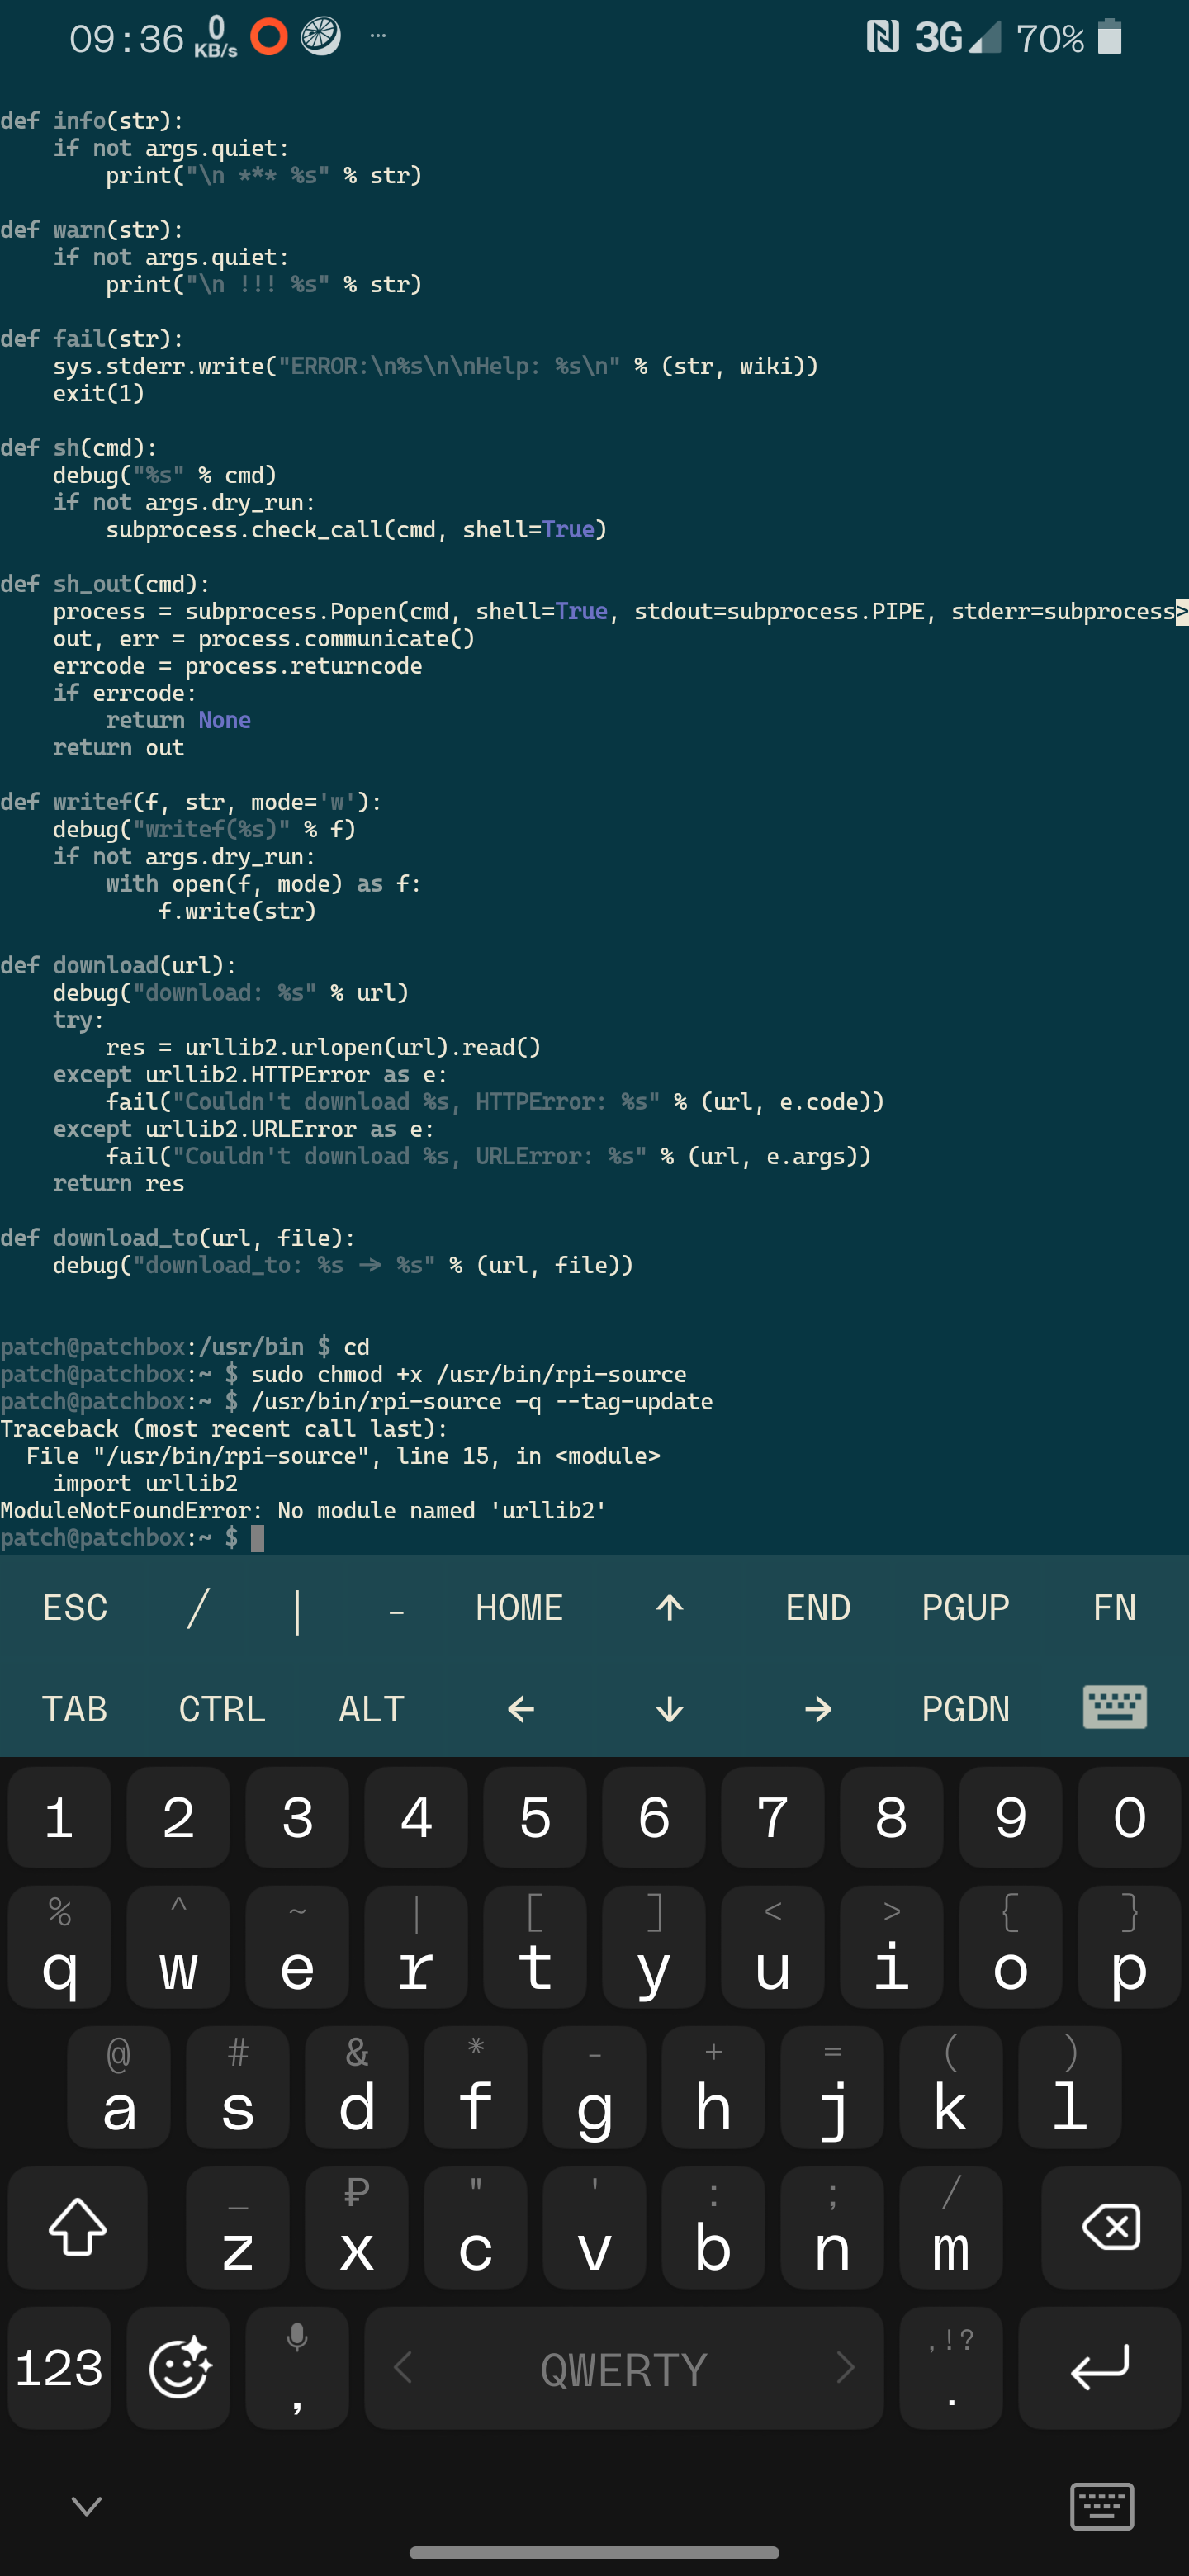
Hi spike, your problem is that the script has been originally written for python2 and you have probably python3 installed on raspberry so the script have to be converted from 2 to 3.
You can try to modify each specific error coming out, but it is possible that when you fix an error some other errors pops out. So it is better to use a tool that handle that conversion for you.
There is a tool named 2to3 that can be used for this purpose.
Do this
sudo apt install 2to3
sudo apt install python3-lib2to3
sudo apt install python3-toolz
You can simply go into directory where your python file is, and type the following command:
2to3 ./rpi-source
Now you should have your file converted. However it is difficult to remotely guide you without testing anything here. Hope this work.
Let me know.
Thank you very much, I’ll definitely try to do it as you wrote, I hope it helps
In general, this did not help, there were many errors again
I guess you have to go into a manual code rewrite for solving all errors. I can try to help you but i don’t know if is possible to work on the code without having the hardware connected, try to upload the code somewhere so we can have a look.
Hello spike, i downloaded the script and did a quick modify for running on python3
The new script is
rpi-source.zip (4.8 KB)
Take into account that this script try to update itself from a git repository so if you launch the script it will rewrite itself with the wrong version. To avoid that to occurs you need to launch it with the --skip-update option.
I executed the code using the -s option that make a simulation only run without writing modifying the system.
My run is
patch@patchbox:~ $ python rpi-source --skip-update -s --verbose --tag-update

 *** SoC: BCM2837
download: https://api.github.com/repos/notro/rpi-source/git/refs/heads/master

 *** Set update tag: 29412cabdf5fc6a6d69ee00489d2c058c07668cd
writef(/home/patch/.rpi-source)
It seems to work but i cannot verify with the real hardware what will happen. For safety reason run a backup first.
Hope it help.