In Step-by-Step.01, we saw that the LEDs on Midihub show which patch we’re using.
In this session, we will write a patch to show they can tell us more than that
Cables needed: just the USB.
Other gear: PC with Midihub Editor
Let’s start!
First, Connect Midihub to the Editor
![]()
Second, click Device → Export Everything

(optional - just to feel safe! Then later you can Import Everything to get back to where you were)
Now let’s start a new patch:
File → New
(Editor might ask “Do you want to save the pipeline?”. Click Discard)
Now let’s start building the patch:
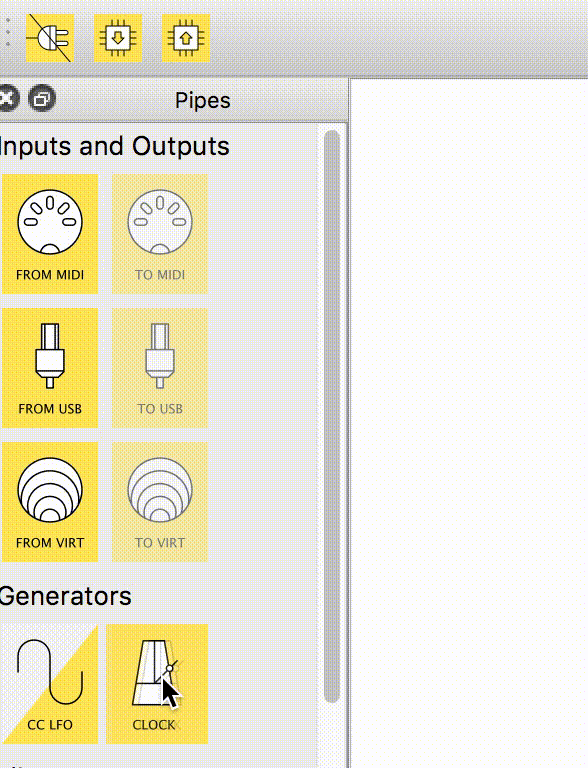
Drag a CLOCK Pipe into the Pipelines Pane:
pipes sometimes find a place when they're dropped...
but only when they start a new pipeline!
Now drag TO MIDI next to the CLOCK Pipe…
See it now says TO A…
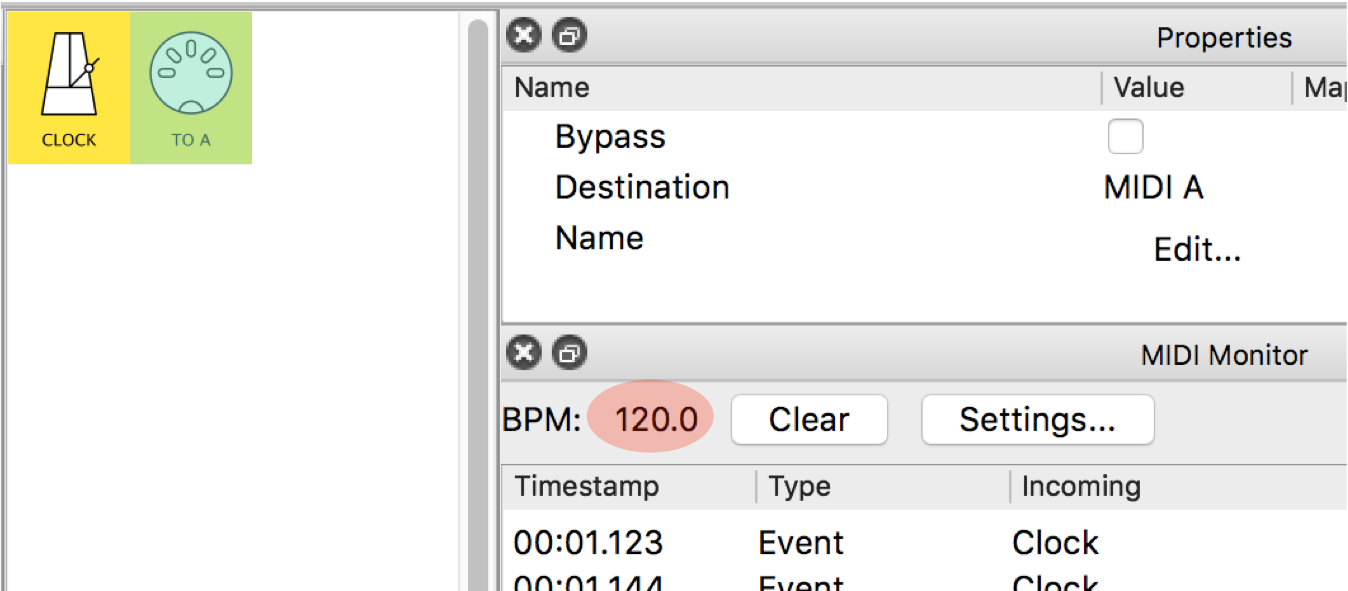
and the Destination in Properties Pane says MIDI A
See: MIDI Monitor shows the BPM going out that port
Can't see the MIDI Monitor Pane?
You’ll be looking at it a lot!
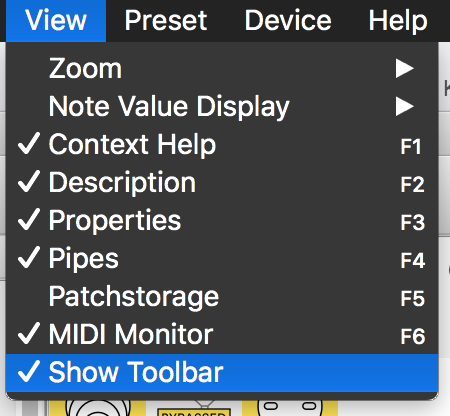
click View → MIDI Monitor
Now check the Midihub:

See: the LED for TO A is flashing…
…2x a sec - Once per beat…
…that’s 120 BPM
Now…
Double-Click on the TO A pipe…
…that’s a quick way to tell Midihub to Bypass a Pipe:
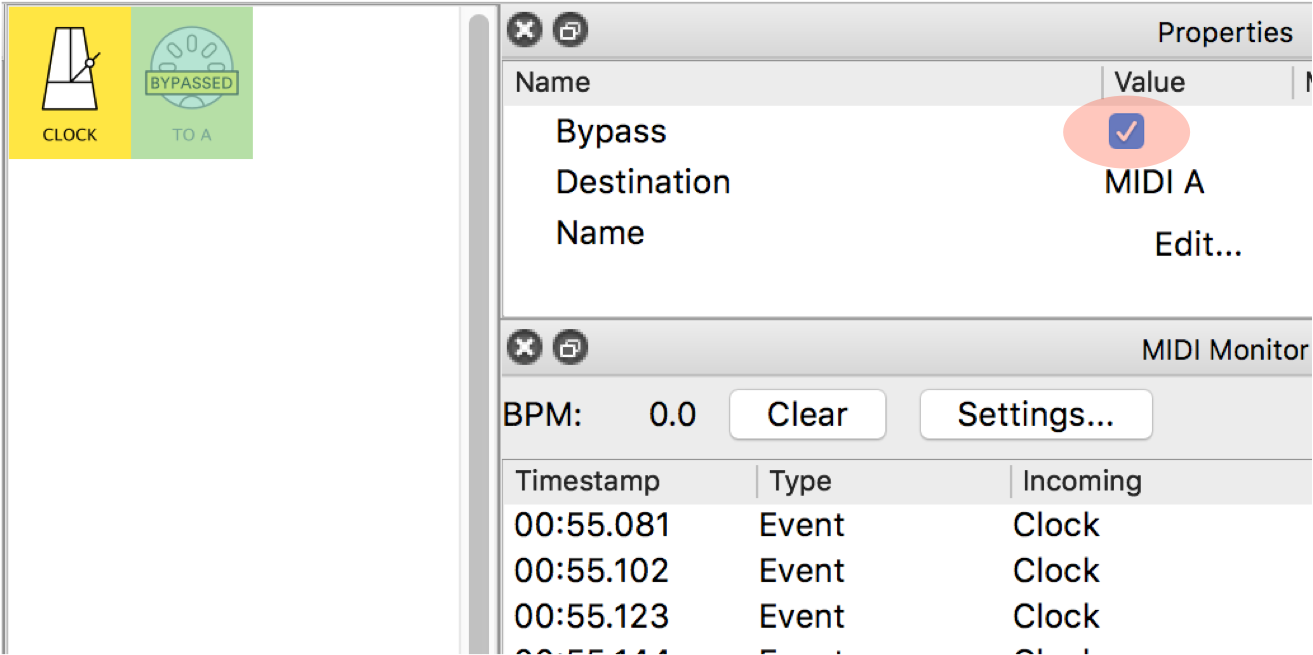
See Also now the BPM is now 0.0…
… and the LED stops flashing.
![]() more on
more on Bypass later
Now… let’s send different BPMs out of different ports…
…but from the same CLOCK…
First: change the Pipes to this:
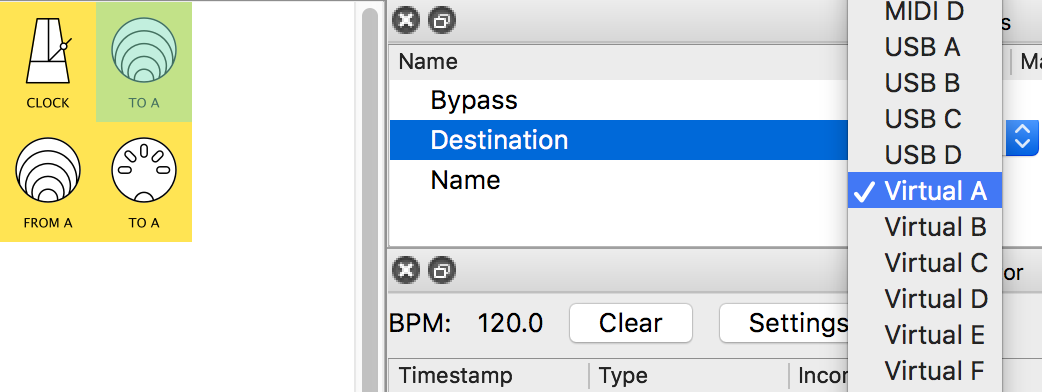
See: the TO A pipe has been changed to a Virtual A
See: the LED for TO A is still flashing (2x a sec - Once per beat)
Nothing has changed yet…
…but now we can use the Clock for more ports!
So Now…Right-Click on the last pipeline and choose:
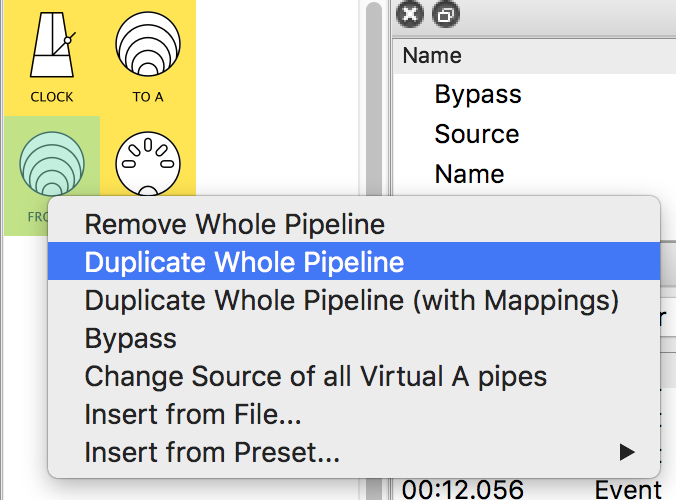
change TO A into TO B…
… and add a TEMPO DIV pipe…
… and set Divide By to 2:
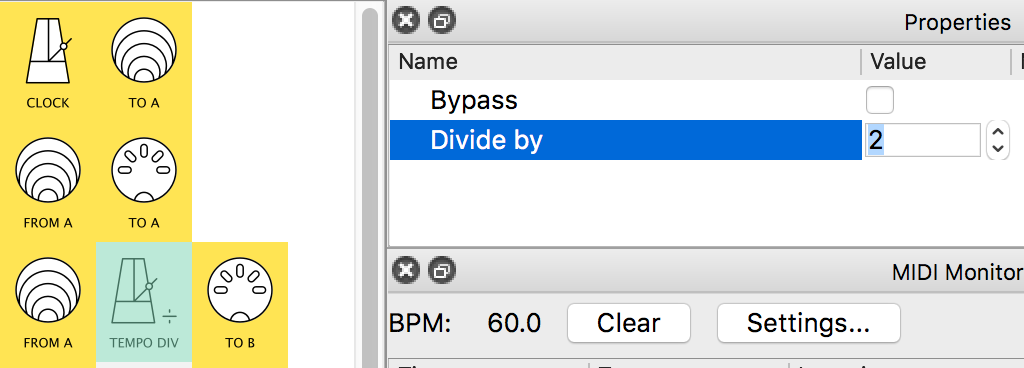
Now See: how the LED for TO B flashes slower…
…and the BPM is now 60
You’ve now got the same Clock giving different BPMs out of different ports!
Now do it again:
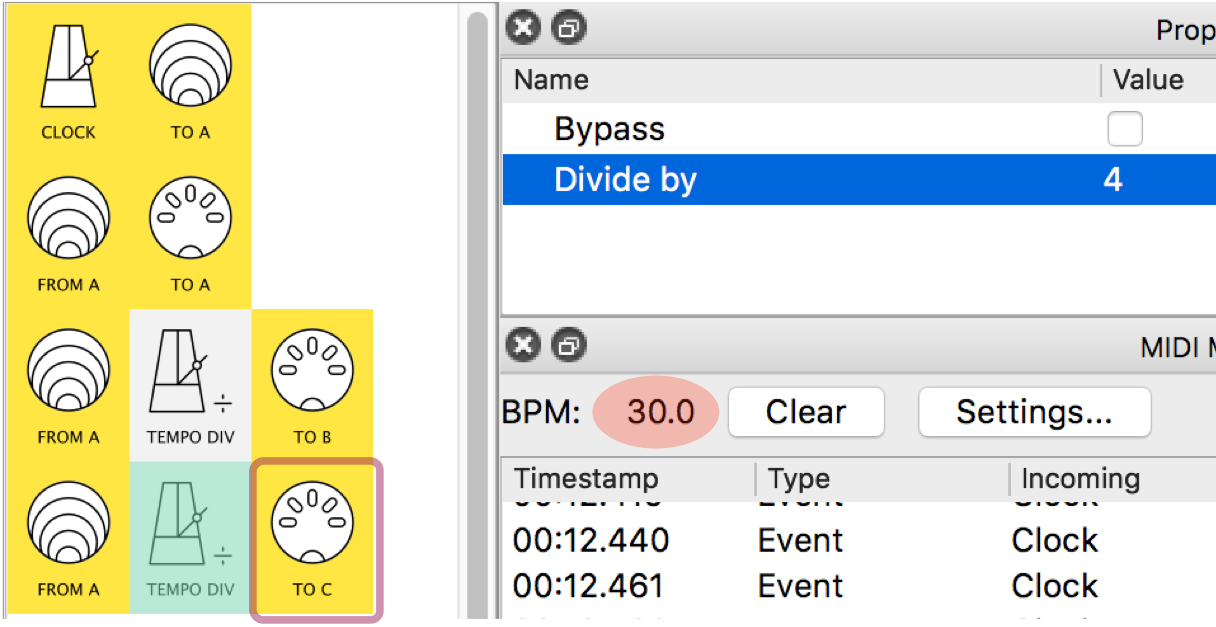
See: The Divide By is now 4
Check the BPM and watch the different flashing rates
take a moment…
To imagine what
Tempo Dividerpipes could lead to
… as well as plain practical solutions…
… poly-rhythms with two or more sequencers (Volca fans often own several!)
… and much more
Finally Duplicate Whole Pipeline again with one of the “Tempo Divider pipelines”…
… and change the Destination of its out-pipe to USB A.
See that the USB/Power LED is now flashing…
…so the Clock is now going out to the PC.
![]() Now we’re done building, you might want to find out more on
Now we’re done building, you might want to find out more on Bypass:
Clicking Bypass…
...stops a Pipe from doing it's job...
- for all pipes it means data passes through as if the Pipe wasn’t there…
…try clicking one of theTEMPO DIVpipes to see the effect on the BPM and LEDs - so for an In-Pipe or Out-Pipe that means stopping data going through at all
To finish up, choose between:
File→Saveyour patch on disk
(toDevice→Storein a Midihub preset another time)Device→Storeit in a Midihub preset now.
(Are you sure you want to overwrite the patch stored?
RememberExport Everythingnear the start?)- just do nothing…
… your changes stay in Midihub’s “volatile” memory until…
… another preset is loaded…
… or you switch Midihub off*
*(Try it: you can recover the volatile memory contents before they’re lost if you connect to the Editor again)
Now click Disconnect:

See: that the LEDs keep flashing…
… because the patch is still in memory…
...want to find out more?
Try these steps… ![]() (this will be a separate item on this page (probably)
(this will be a separate item on this page (probably)
Now you know…
- how to drag pipes to set up a patch.
- how to Duplicate a Whole Pipeline
- how to use Virtual pipes to do more than one thing with an output
- how to start making changes to different outputs
- how to
Bypassa pipe- and that you can send a copy of a pipeline’s output to your computer
Next, time to look at some messages coming in to Midihub
That’s the end of this episode.
The next episode will help you learn how to use the MIDI Monitor to really understand what’s going on inside Midihub.
The following entries on this topic are helpful comments from users on how to improve the tutorial above.
Many of the suggestions will have already been incorporated.
Feel free to add your own comment or question below!